‘Tis the season for these incredible peppermint cookies! As a holiday baking enthusiast, I’ve perfected this recipe through countless December afternoons in my cozy kitchen. The magical aroma of fresh mint and sweet vanilla will transform your home into a winter wonderland.
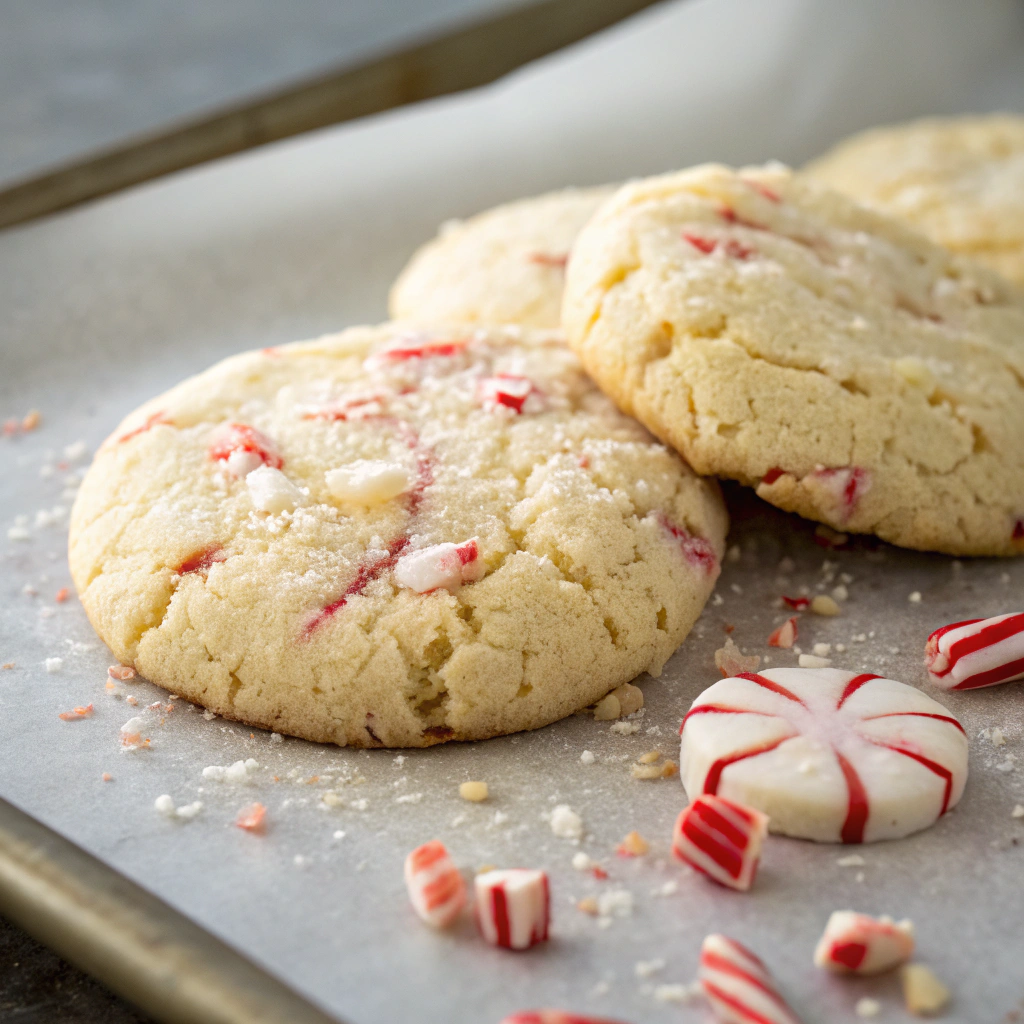
These festive treats strike the perfect balance between chewy centers and crispy edges, with crushed candy canes adding a delightful crunch. You’ll love how the white chocolate drizzle creates beautiful swirls across each cookie, making them absolutely Instagram-worthy. Trust me, these cookies disappear faster than snow on a sunny day at every holiday party!
Whether you’re an experienced baker or just starting out, this peppermint cookies recipe is practically foolproof. Let’s create some sweet holiday memories together!
Why Peppermint Cookies Are a Holiday Essential
Traditional Christmas Cookie Heritage
Peppermint cookies have danced through holiday traditions since the 1800s, when candy makers first twisted red and white stripes into candy canes. As families gathered around crackling fires, clever bakers crushed these minty treats into their cookie dough. What started in European kitchens quickly became an American Christmas staple!
The refreshing zip of peppermint actually helps settle full tummies after big holiday meals – a sweet bonus our great-grandmothers knew well. Back then, folks would hang these treats on their Christmas trees, filling their homes with that unmistakable minty scent.
I learned this charming detail from my grandmother, who still tells stories of “cookie decorating day” when neighborhood kids would string cookies with ribbon. Today, we might not hang them anymore, but that magical mix of butter, sugar, and cool peppermint still brings families together, just like it did generations ago.
Unique Flavor Chemistry of Mint and Sugar
Ever wonder why peppermint cookies taste so magical? It’s all about fascinating flavor science! The menthol in peppermint actually tricks your taste buds into sensing a cool sensation, while sugar molecules amplify this refreshing effect.
When you’re making these festive treats, crushing candy canes releases natural peppermint oils that blend perfectly with buttery cookie dough. I discovered through countless batches that letting the dough rest for 30 minutes helps these flavors meld together beautifully.
The cool thing is, mint compounds are fat-soluble, which means they need the butter in your cookie dough to really shine. That’s why the best peppermint cookies have that perfect balance of richness and cool mint zing! Plus, the crystalline structure of sugar helps preserve the volatile mint compounds, keeping your cookies wonderfully aromatic for days.
Nutritional Benefits of Natural Peppermint
When making peppermint cookies recipe favorites, you’re actually treating yourself to some surprising health perks! Natural peppermint contains essential oils packed with rosmarinic acid, a powerful antioxidant that helps fight winter sniffles. I started adding fresh mint leaves to my cookie dough last year, and wow – the benefits are amazing!
Beyond its refreshing taste, peppermint naturally aids digestion and can help calm those post-holiday tummy troubles. The flavonoids in mint also support heart health, while its natural compounds might boost your focus during busy baking sessions.
Fun fact: just the smell of peppermint can increase alertness! If you’re watching your sugar intake, you’ll be happy to know that mint’s intense flavor lets you reduce sweeteners while keeping that festive taste. Plus, peppermint’s antimicrobial properties help these treats stay fresher longer in your cookie jar.
Step-by-Step Peppermint Cookie Making Guide
Gathering and Measuring Ingredients

Let’s kick off our peppermint cookies recipe adventure with proper prep! First, grab your measuring tools and ingredients. You’ll need all-purpose flour, unsalted butter at room temperature (this is crucial for that perfect texture!), and pure peppermint extract – trust me, the real stuff makes all the difference.
I learned the hard way that skipping precise measurements can lead to cookie chaos! Speaking of measurements, our Perfect Chocolate Melting guide will help you nail the chocolate coating later. Line up your granulated sugar, powdered sugar, eggs, and vanilla extract.
Don’t forget the star ingredient – crushed candy canes! I like to prep two bowls: one for dry ingredients and another for wet. Having everything measured and ready makes the mixing process smooth as silk. Plus, this prep method helps you catch any missing ingredients before you’re elbow-deep in cookie dough!
Mixing & Shaping Your Peppermint Cookie Dough
Now comes the fun part of our peppermint cookies recipe adventure! In a stand mixer, cream your room-temperature butter until it’s light and fluffy – about 2-3 minutes. Add both sugars and beat until the mixture looks like sandy beaches.
Next, drop in your eggs one at a time, followed by that magical peppermint extract. Here’s a pro tip: start with half the recommended extract and taste-test your dough. You can always add more, but too much will make your cookies taste like toothpaste!
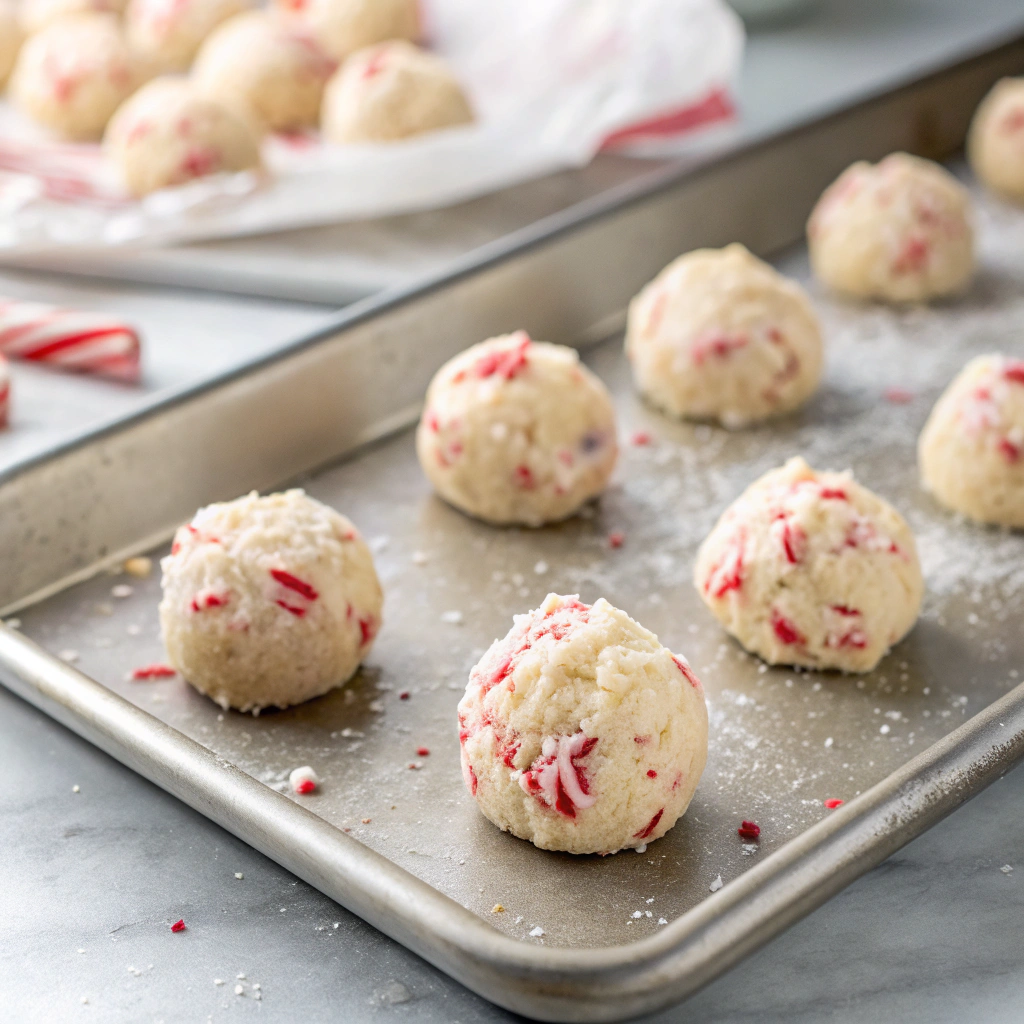
Once combined, gradually mix in your dry ingredients until just incorporated. Don’t overmix, or you’ll end up with tough cookies! Roll the dough into 1-inch balls, then give them a little smoosh with a fork to create that classic criss-cross pattern. A light dusting of crushed candy canes on top before baking adds the perfect festive touch!
Baking Your Peppermint Cookies to Perfection
These peppermint cookies need just the right touch in the oven! Preheat to 350°F (175°C) and line your baking sheets with parchment paper. Space those cookie dough balls about 2 inches apart – they’ll spread while baking into perfect circles.
Pop them in the oven for 12-14 minutes, watching for those telltale golden edges. Here’s a pro baker’s secret: take them out when the centers still look slightly underbaked. They’ll continue cooking on the hot baking sheet, giving you that perfect chewy-yet-crispy texture.
Let them cool for 5 minutes on the sheet before transferring to a wire rack. Want to test if they’re ready? The edges should be firm, but gently pressing the center should leave a slight indentation. For extra festive flair, dust with crushed candy canes while they’re still warm – the residual heat helps the minty bits stick perfectly!
Professional Baker's Secret Tips
Temperature Control Techniques
Mastering peppermint cookies starts with perfect temperature control. Your butter should be cool but pliable – when pressed, it should yield slightly without being greasy. Room temperature eggs incorporate better and create a more uniform dough.
Here’s a game-changing tip: chill your cookie dough for at least 2 hours, but ideally overnight. This resting period allows the flour to hydrate fully and the flavors to meld beautifully. For consistent results, use an oven thermometer – most ovens can be off by 25 degrees!
Pre-chill your baking sheets too; this prevents premature spreading when you place the dough. If your kitchen’s warm, work in batches, keeping unused dough in the fridge. For that professional-looking finish, master essential knife skills when chopping candy canes or chocolate – uniform pieces melt evenly and look stunning.
Flavor Enhancing Mix-Ins
For show-stopping peppermint cookies, strategic mix-ins make all the difference. Crushed candy canes should be mixed in two stages – half in the dough and half pressed on top before baking. White chocolate chips add creamy bursts that complement the cool mint perfectly.
Want next-level texture? Try adding crushed Oreo pieces for a cookies-and-cream twist. Dark chocolate chunks create an indulgent contrast against the bright peppermint. Pro tip: toast nuts like pecans or walnuts before adding them – the warmth brings out natural oils that elevate the overall flavor profile.
For extra minty magic, fold in some pure peppermint extract with the vanilla. Remember to fold mix-ins gently by hand rather than using a mixer to prevent overworking the dough. This preserves the perfect cookie texture while ensuring even distribution of all those yummy additions.
Storage and Packaging Tips
Proper storage is crucial for keeping your peppermint cookies fresh and festive. Store them in an airtight container with wax paper between layers to prevent sticking and maintain that perfect texture. At room temperature, they’ll stay fresh for up to 5 days – just keep them away from direct sunlight and heat sources.
For longer storage, these cookies freeze beautifully for up to 3 months. Before freezing, let them cool completely, then place in freezer bags with the air pressed out. When ready to enjoy, thaw them at room temperature for about 30 minutes.
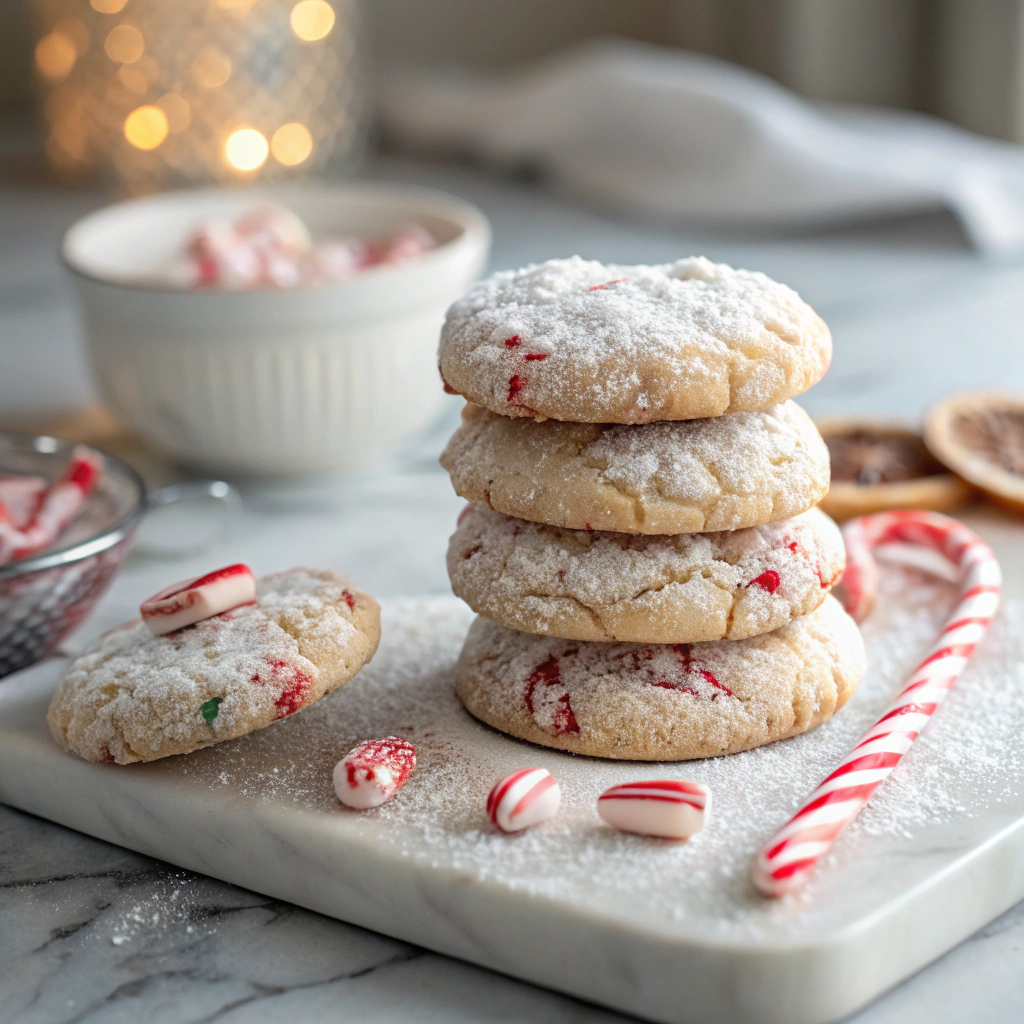
If you’re gifting these treats, package them in festive tins lined with parchment paper. For holiday cookie swaps, stack them in clear cellophane bags tied with ribbon – the red and white colors create an eye-catching display. Remember to label packages with “best by” dates and any allergy information.
Fixing Common Peppermint Cookie Mistakes
Preventing Spreading and Cracking
Making perfect peppermint cookies can be tricky, but understanding common pitfalls helps avoid disappointing results. First, chill your dough thoroughly – at least 2 hours or overnight is best. This prevents excessive spreading during baking. Watch your butter temperature closely; it should be cool room temperature, not melted or too soft.
For those signature crisp edges and chewy centers, position your oven rack in the middle and rotate pans halfway through baking. If cracks keep appearing, your dough might be too dry or your oven too hot. Add 1-2 teaspoons of milk to moisten the dough if needed.
Our white chocolate peppermint cookies recipe shows exactly how to achieve that perfect texture. Remember to use quality peppermint extract – artificial versions can leave a bitter aftertaste. Finally, don’t overbake! The cookies should look slightly underdone when you take them out, as they’ll continue cooking on the hot baking sheet.
Decorating Tips for Perfect Peppermint Cookies
Want your peppermint cookies to look as amazing as they taste? Let’s talk decorating magic! Start by crushing candy canes in a zip-top bag until you get a mix of fine powder and small chunks – this gives you both sparkle and crunch.
While your cookies are still warm (but not hot!), sprinkle the candy pieces on top so they stick naturally. For a pro touch, drizzle melted white chocolate in zigzag patterns using a piping bag or fork. Love that classic red-and-white look? Try our white chocolate peppermint cookies recipe – it’s a crowd favorite during the holidays.
Don’t forget about packaging! Stack cooled cookies with wax paper between layers to prevent sticking. For gift-giving, arrange them in clear cellophane bags tied with festive ribbon. The crushed peppermint will stay crisp for about 3-4 days if stored in an airtight container. Just remember – humidity is your enemy when it comes to keeping those candy pieces crunchy!
Storage Tips for Fresh Peppermint Cookies
Want your peppermint cookies to stay fresh and delicious? Let’s talk storage secrets! Start by letting them cool completely – rushing this step can trap moisture and make them soggy. For short-term storage (3-4 days), use an airtight container with wax paper between layers. Pop a slice of bread in there too – it’ll help keep your cookies soft and chewy.
Got extras? These beauties freeze wonderfully for up to 3 months! Just wrap them individually in plastic wrap, then store in a freezer bag. Remove as much air as possible to prevent freezer burn. If you’ve added chocolate drizzle or candy pieces, freeze them in a single layer first, then stack with parchment paper between layers once frozen solid.
When ready to enjoy, thaw at room temperature for about 30 minutes. The peppermint flavor actually gets better after a day or two as the flavors meld together!
Creative Peppermint Cookie Variations
Classic Candy Cane Crunch

Want to take your peppermint cookies to the next level? Start with crushed candy canes – but here’s the trick: pulse them in short bursts to get both fine powder and small chunks. The powder infuses the dough with sweet minty flavor, while the chunks create delightful crunchy surprises.
Mix these festive bits into your cookie dough last, just before scooping. For extra pizzazz, press a few pieces on top before baking. The heat transforms the candy pieces into gorgeous stained-glass-like spots that sparkle!
Don’t skip chilling the dough – it prevents the candy from melting too quickly. Once baked, let them cool completely on the pan. The candy needs time to reset properly. Pro tip: store these separately from soft cookies, as they can absorb moisture and lose their signature crunch.
These beauties make perfect holiday gifts or cookie swap showstoppers!
White Chocolate Winter Wonderland
For a magical twist on peppermint cookies, let’s explore the snowy side of holiday baking! Start by melting premium white chocolate until silky smooth – the key is keeping the temperature low and steady. Fold in crushed peppermint pieces gently, letting some stay chunky for that perfect winter crunch.
Here’s a pro secret: chill your cookie sheets before baking. This prevents the white chocolate from spreading too quickly and keeps those gorgeous snowflake-like shapes intact. A sprinkle of sparkling sugar before baking creates a glistening, frost-like finish that’s absolutely stunning.
Once cooled, drizzle with extra melted white chocolate and dust with finely crushed peppermint for that picture-perfect winter wonderland effect. Store these beauties in a single layer with parchment paper between – they’re delicate snowflakes after all! Perfect for cookie swaps or packaging as dreamy holiday gifts.
Holiday Candy Cane Magic
For a festive twist on traditional peppermint cookies, let’s talk about the candy cane technique! Crush those striped holiday favorites into tiny bits – I like using a rolling pin for perfectly sized pieces. The secret is adding them both into the dough and as a sparkly coating.
When mixing, fold them in gently at the very end to keep those gorgeous red swirls intact. Pro tip: pop your dough in the fridge for 30 minutes before rolling in extra crushed candy canes. This prevents the pieces from melting too quickly during baking.
The result? Cookies with a delightful crunch and that classic mint-vanilla aroma that screams “holidays!” These beauties stay fresh for up to a week in an airtight container, though good luck keeping them around that long! They’re perfect for cookie exchanges or wrapped up as sweet holiday gifts.
Start Baking Your Perfect Peppermint Cookies Today
Ready to create holiday magic? Grab your mixing bowls and let’s make these crowd-pleasing peppermint delights together! Click below for the printable recipe card and step-by-step video tutorial. Don’t forget to share your cookie success stories in the comments – I love seeing your creative twists on this family favorite!
Peppermint Cookies Recipe
These delightful peppermint cookies combine the perfect balance of sweetness and cool mint flavor. With a crisp exterior and slightly chewy center, they're topped with crushed candy canes for extra holiday flair.
Ingredients
Cookie Dough:
Topping:
Instructions
Preparation:
- Whisk together flour, baking soda, and salt in a medium bowl
- In a large bowl, cream butter and sugar until light and fluffyabout 3 minutes
- Beat in egg, peppermint extract, and vanilla extract
- Gradually mix in dry ingredients until just combined
- Chill dough for at least 1 hourDough should be firm to touch
Baking:
- Preheat oven to 350°F
- Line baking sheets with parchment paper
- Roll dough into 1-inch balls
- Place 2 inches apart on prepared sheets
- Bake for 11-13 minutes until edges are lightly goldenCenters should look slightly underdone
- Sprinkle with crushed candy canes while warm
- Cool on baking sheets for 5 minutes
- Transfer to wire rack and dust with powdered sugar
Nutritional values
Servings: 24 ServingCalories:125kcalTotal Fat:5.5gSodium:85mgTotal Carbohydrate:18gDietary Fiber: 0.3gSugars: 11gProtein:1.2g
Note
Storage:
Store in airtight container at room temperature for up to 1 week
(Keep away from heat and moisture)
Reheating:
Not recommended for these cookies
Freezing:
Freeze unfrosted cookies for up to 3 months in freezer-safe container
(Thaw at room temperature for 2 hours before serving)
Variations:
Dark Chocolate Dipped: Half-dip cooled cookies in melted dark chocolate
Double Mint: Add mini chocolate mint chips to dough
White Chocolate Drizzle: Drizzle melted white chocolate over cooled cookies
Common Issues:
Spreading too much: Dough not chilled enough; return to refrigerator
Too crispy: Overbaked; remove when centers still look slightly soft
Candy cane topping melts: Added too soon; let cookies cool 1-2 minutes first