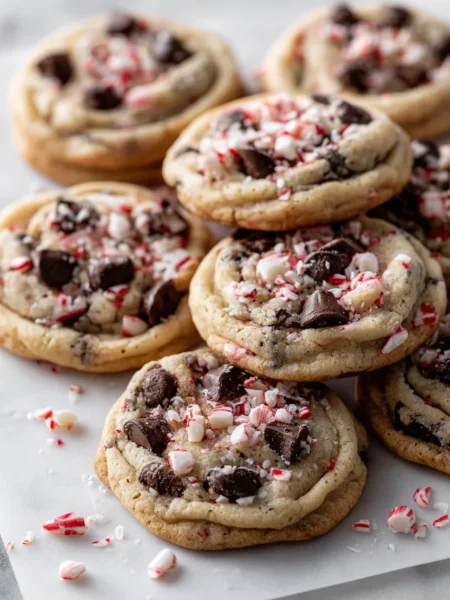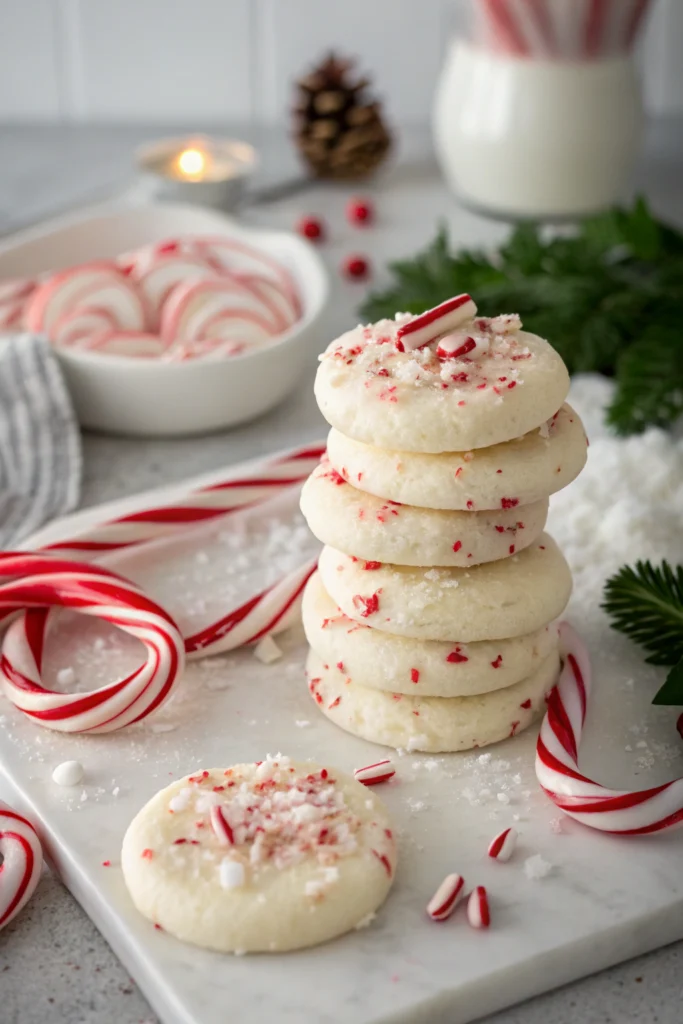

‘Tis the season for these incredible peppermint cookies that’ll make your kitchen smell like a winter wonderland! As a holiday baking enthusiast, I’ve perfected this recipe over countless December afternoons. The satisfying crack of candy canes as you crush them, combined with the buttery cookie dough, creates pure Christmas magic.
These festive treats strike the perfect balance between chewy centers and crispy edges. You’ll love how the cool peppermint mingles with rich vanilla notes in every bite. Best of all? They’re surprisingly simple to make – no fancy equipment needed!
Whether you’re planning a cookie exchange or surprising Santa, these peppermint cookies will become your go-to holiday recipe. Let’s create some sweet memories together!
Why Peppermint Cookies Are a Holiday Essential
Traditional Christmas Cookie Heritage
Peppermint cookies have graced holiday tables since the 1800s, when candy canes first became popular Christmas tree decorations. Back then, clever home bakers would salvage broken candy canes by crushing them into their sugar cookies. What started as thrifty resourcefulness became a beloved tradition! The signature red-and-white swirls we know today actually began in the 1920s, when a candymaker in Georgia added festive stripes to his peppermint sticks.
The cool, refreshing flavor naturally pairs with warm winter drinks like hot cocoa and coffee. I remember my grandmother telling stories of Depression-era Christmas celebrations where these cookies were often the only sweet treat available. Their simple ingredients – butter, sugar, flour, and broken candy canes – made them accessible even in tough times. Now they’re a cherished part of American holiday baking, bringing both nostalgia and joy to cookie platters everywhere.
Unique Candy Cane Cookie Chemistry
Peppermint cookies hold a fascinating scientific secret in their crispy-chewy texture. When crushed candy canes melt during baking, their sugar molecules create tiny crystalline structures that give these treats their signature crunch. Meanwhile, the peppermint oil releases aromatic compounds that actually intensify in the oven’s heat. I’ve discovered that chilling the dough for at least 2 hours helps prevent the candy pieces from melting too quickly.
The sugar crystals in candy canes also attract moisture, which explains why these cookies stay softer in the center compared to regular sugar cookies. For the perfect balance, I recommend crushing some candy canes finely and leaving others in larger pieces. This creates varied texture zones throughout each cookie. The mint oils also naturally preserve the cookies, which is why they often stay fresh longer than other holiday varieties.
Health Benefits of Natural Peppermint
Did you know that peppermint cookies can actually offer some surprising health perks? Real peppermint, which gives these festive treats their signature flavor, contains natural compounds that aid digestion and boost mood. I’ve found that using pure peppermint extract in my cookies provides more benefits than artificial flavoring. The menthol in peppermint naturally soothes upset stomachs and can help reduce stress – perfect after a big holiday meal!
Studies show that just smelling peppermint while baking can improve focus and mental clarity. For maximum health benefits, I recommend using organic peppermint extract and combining it with dark chocolate, which adds antioxidants to your cookies. Plus, peppermint’s natural antibacterial properties make it a smart choice for holiday baking. Remember though, moderation is key – while these cookies offer some benefits, they’re still a sweet treat!
Complete Guide to Making Peppermint Cookies
Measuring and Mixing the Base Dough
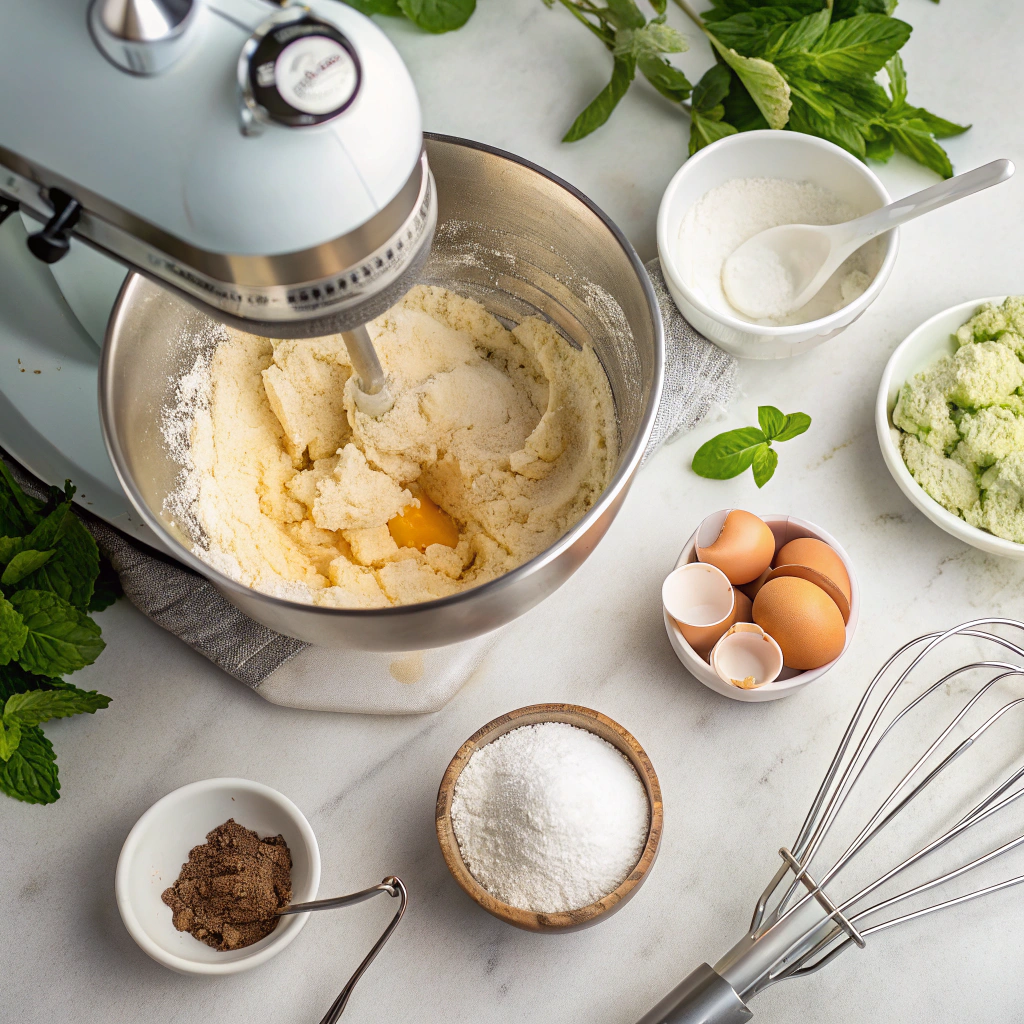
Creating the perfect peppermint cookie starts with precise measurements and proper mixing technique. Begin by bringing butter to room temperature – this crucial step ensures your dough comes together smoothly. In a large bowl, cream softened butter with granulated sugar until light and fluffy, about 3-4 minutes. Next, add eggs one at a time, beating well after each addition.
For that signature minty freshness, carefully measure pure peppermint extract – remember, a little goes too far! Whisk your dry ingredients separately to ensure even distribution of leavening agents. When combining wet and dry ingredients, mix just until incorporated to avoid tough cookies. The final dough should be soft but not sticky, holding its shape when rolled into balls. If it feels too wet, chill for 30 minutes before shaping.
Decorating and Finishing Touches
Transform your peppermint cookies from simple treats to showstoppers with the right finishing touches. Start by preparing a smooth royal icing – it should be thick enough to hold shape but fluid enough to settle into a glossy finish. Divide the icing and tint portions with festive colors like red and green. Pipe delicate swirls or zigzags onto cooled cookies, then sprinkle with crushed candy canes while the icing is still wet.
For a professional touch, dust some cookies with shimmer powder or add tiny silver dragées. Consider packaging options too – stack them in clear cellophane bags tied with ribbon, or arrange them in vintage cookie tins lined with parchment paper. The key is working quickly with your decorations before the icing sets. Remember to let decorated cookies dry completely before storing or stacking to preserve your beautiful designs.
Storage and Gifting Tips
Keep your peppermint cookies fresh and gift-ready with proper storage techniques. Line airtight containers with wax paper and place cookies in single layers, separating each with additional wax paper to prevent sticking. For optimal freshness, store at room temperature for up to 5 days or freeze for up to 3 months. When freezing, wrap cookie stacks in plastic wrap before placing in freezer bags – this prevents freezer burn and keeps the minty aroma intact.
For gifting, consider creative packaging like vintage cookie tins, clear treat boxes with festive ribbons, or mason jars decorated with holiday fabric toppers. Include storage instructions with gifted cookies and suggest serving them slightly chilled to enhance the peppermint flavor. Pro tip: Place a slice of bread in the storage container to keep cookies soft, replacing it every few days as needed.
Professional Secrets for Perfect Results
Temperature Control Mastery
Achieving the perfect peppermint cookies starts with mastering temperature control. Your butter should be softened but still cool to the touch – around 65°F (18°C) is ideal. This ensures your dough stays workable without becoming greasy. When chilling the dough, aim for exactly 30 minutes at 40°F (4°C) to prevent spreading while baking. Room temperature eggs incorporate better, so set them out 30 minutes before mixing.
For baking, position your rack in the center and preheat thoroughly to 350°F (175°C). Watch for visual cues: edges should be lightly golden while centers remain slightly soft. Let cookies cool on the baking sheet for precisely 5 minutes – they’ll continue cooking from residual heat. Transfer to a wire rack where the cooling process allows the peppermint flavor to fully develop and the texture to reach that perfect crisp-chewy balance.
Mixing & Texture Techniques
Creating irresistible peppermint cookies requires mastering key mixing methods that affect texture. Start by creaming butter and sugar until light and fluffy – about 3-4 minutes at medium speed. This incorporates air for tender results. When adding peppermint extract, use small amounts and taste between additions to avoid overpowering mint flavor. For perfectly distributed mint chips, toss them in 1 tablespoon of flour before folding into dough.
The secret to chewy centers lies in mixing just until ingredients combine – overmixing develops too much gluten. Test doneness by gently pressing the edge – it should feel set but still slightly soft in the middle. Let cookies rest on baking sheets for exactly 2 minutes before moving to cooling racks. This allows the structure to set while keeping that perfect balance of crispy edges and soft centers that makes peppermint cookies absolutely crave-worthy.
Storage & Shelf Life
For perfectly fresh peppermint cookies that maintain their delightful texture, proper storage is crucial. Store cooled cookies in an airtight container, placing wax paper between layers to prevent sticking. At room temperature, they’ll stay fresh for up to 5 days – though good luck keeping them around that long! For longer storage, these treats freeze beautifully for up to 3 months. Just wrap them individually in plastic wrap before placing in a freezer bag.
The key is removing as much air as possible to prevent freezer burn. When ready to enjoy, thaw frozen cookies at room temperature for about 30 minutes. For gift-giving, package peppermint cookies in decorative tins lined with parchment paper. Pro tip: toss a slice of bread in the storage container – it helps maintain moisture and keeps cookies soft and chewy. Remember to keep them away from heat sources and direct sunlight to preserve that perfect balance of crispy edges and soft centers.
Solving Common Peppermint Cookie Challenges
Preventing Flavor Intensity Issues
Getting the perfect peppermint flavor in your cookies can be tricky – too little feels disappointing, while too much can overwhelm. Start with quality peppermint extract, adding just 1/4 teaspoon per cup of flour as your baseline. Remember that peppermint intensifies during baking and storage, so resist the urge to add extra at first. For natural depth, try combining pure peppermint extract with a tiny drop of vanilla extract.
If your cookies taste too strong after baking, don’t worry! The intensity will mellow slightly after 24 hours. When working with crushed candy canes, sprinkle them on top rather than mixing into the dough – this creates a perfect balance of flavors and that signature candy cane crunch. Test small batches until you find your ideal ratio, and always measure extracts with precision. The goal is a refreshing hint of mint that complements rather than dominates the buttery cookie base.
Troubleshooting Dough Issues
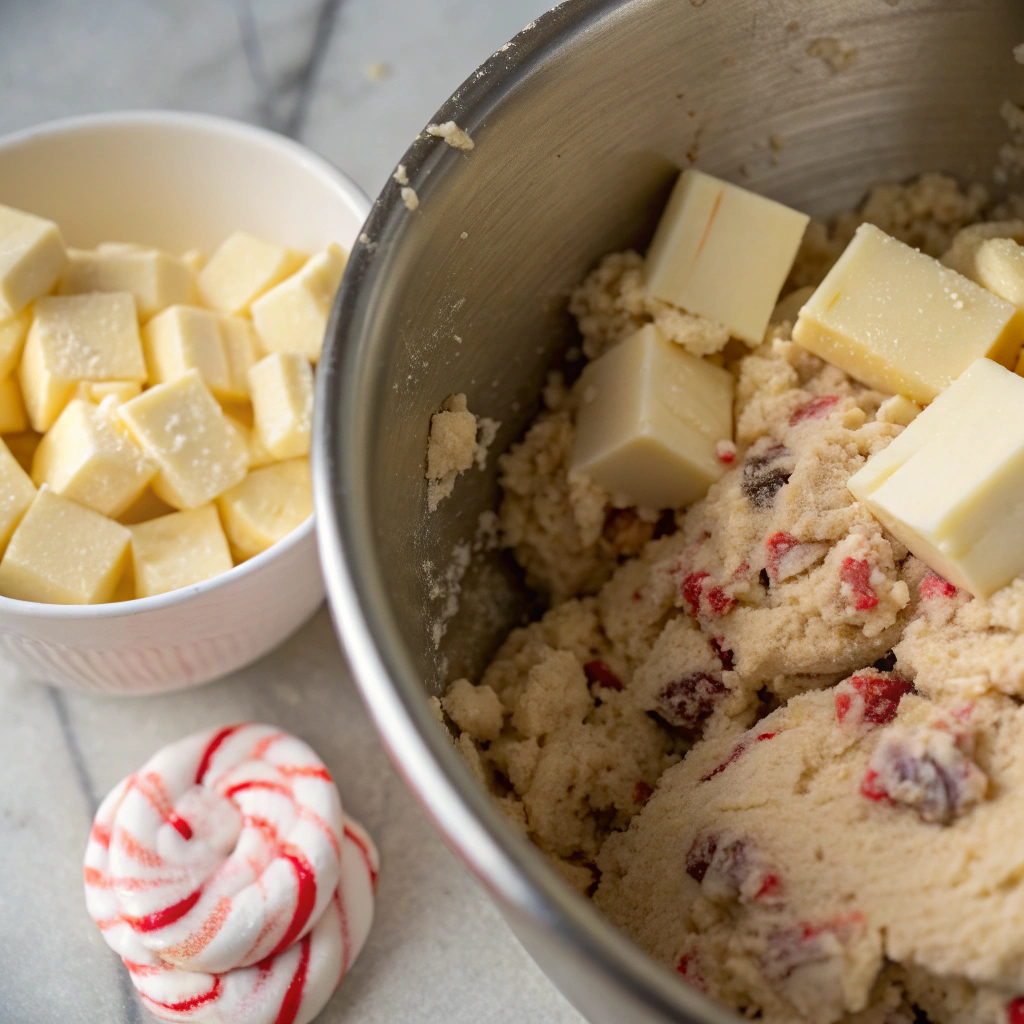
Making perfect peppermint cookie dough can be tricky, but a few key techniques will help you succeed. Start by chilling your dough for at least 2 hours – this prevents spreading and keeps those pretty swirled patterns intact. If your dough feels too sticky, dust your hands with powdered sugar instead of flour to maintain the right sweetness balance. For perfectly shaped cookies, use a cookie scoop and press down gently with a glass bottom dipped in sugar.
Watch out for overmixing, which can make cookies tough – stop as soon as the dough comes together. If cracks appear while rolling, let the dough warm slightly at room temperature for 5-10 minutes. For picture-perfect swirls, divide your dough in half, tint one portion with natural food coloring, then twist together gently. Remember that chilled dough may need a few extra minutes of bake time. Test one cookie first to nail the perfect timing for your oven.
Decorating Tips for Festive Peppermint Cookies
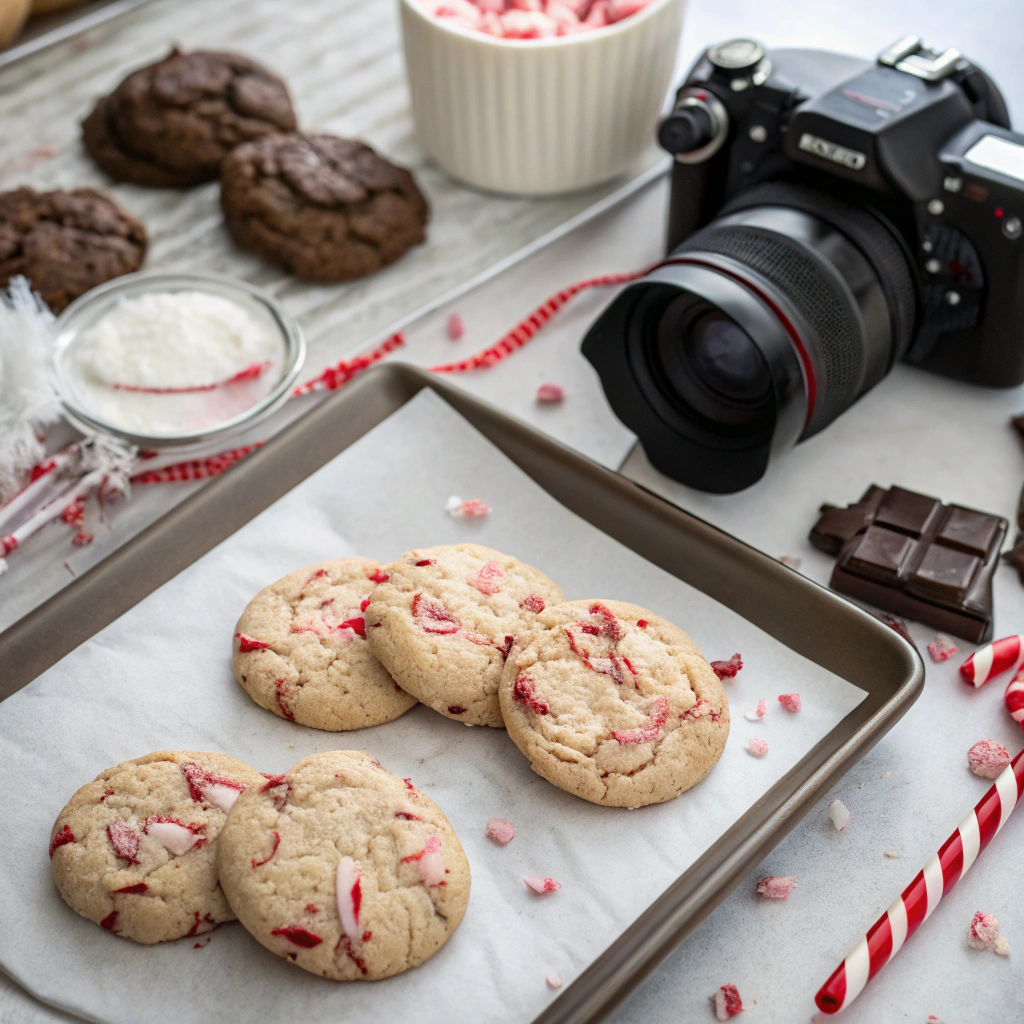
Create stunning holiday treats with simple decorating techniques that make your peppermint cookies shine. Start by drizzling melted white chocolate in zigzag patterns across cooled cookies, then sprinkle with crushed candy canes while still wet for that classic festive look. For picture-perfect cookies, try dipping half the cookie in dark chocolate and adding red and white sprinkles. Royal icing works beautifully for creating snowflake patterns or candy cane stripes – just be sure to let each layer dry completely. If you’re looking for more inspiration, check out this delicious recipe for white chocolate peppermint cookies.
Get creative with marbled effects by swirling red and white royal icing together before piping. Kids love helping to decorate with colorful sanding sugars and edible glitter. For gift-worthy presentation, stack cookies in clear cellophane bags tied with ribbon, or arrange them on holiday platters with fresh mint leaves for a pop of green. Remember that simple designs often look the most elegant!
Creative Peppermint Cookie Variations
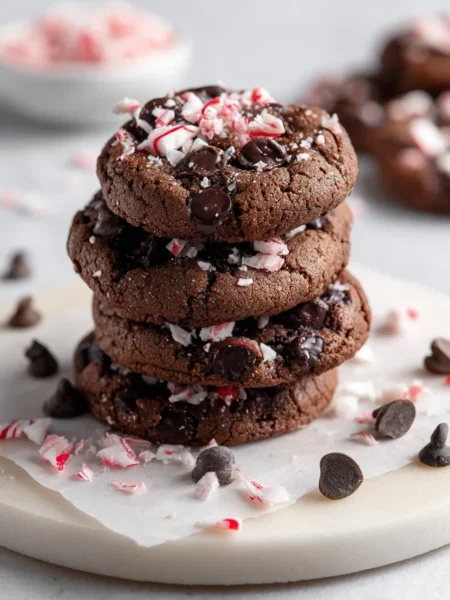
Double Chocolate Peppermint Swirls
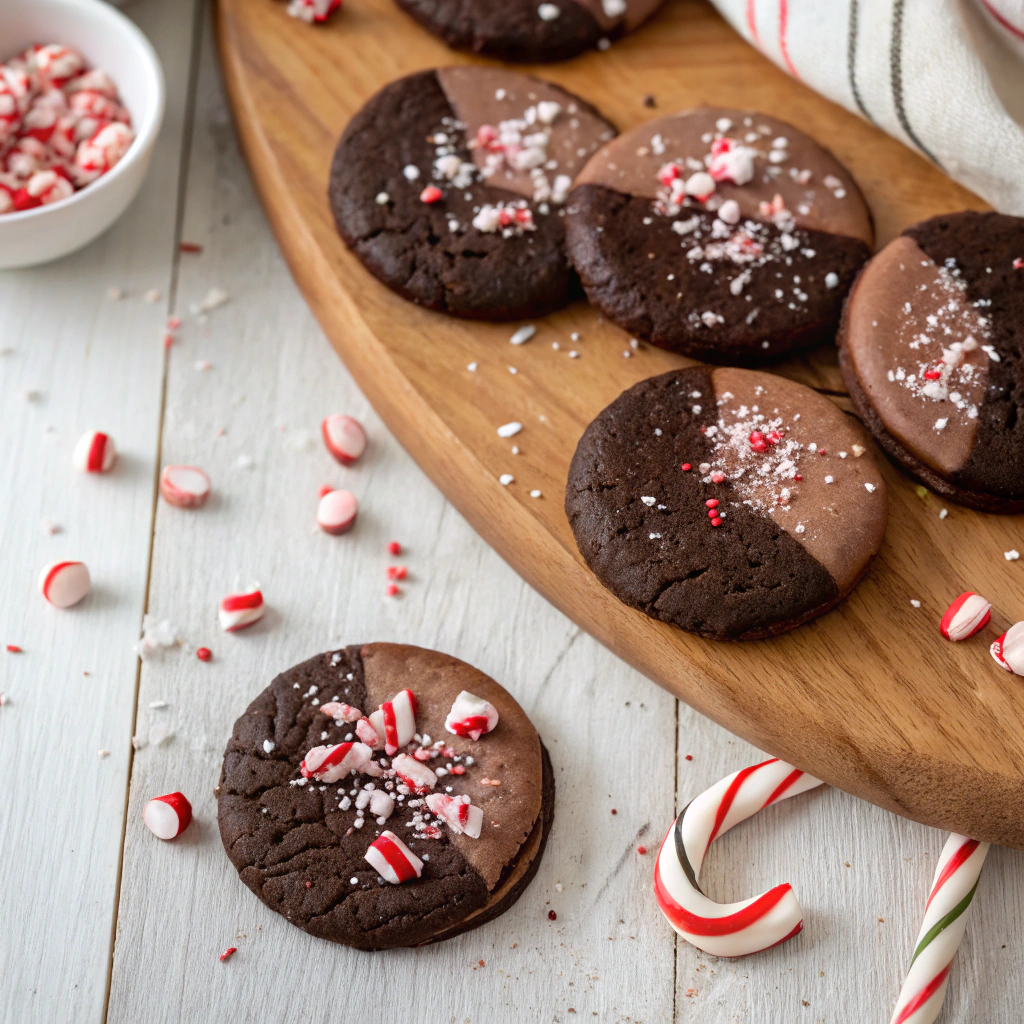
Transform your peppermint cookies into decadent chocolate delights that’ll make everyone swoon. Start with a rich chocolate cookie base, then fold in crushed candy canes and premium dark chocolate chunks. The secret is chilling the dough thoroughly – this prevents spreading and keeps those beautiful swirls intact. While the cookies are still warm from the oven, press additional candy cane pieces on top for extra crunch and visual appeal.
For the ultimate chocolate lover’s twist, dip half of each cooled cookie in melted dark chocolate and sprinkle with finely crushed peppermint candies. The combination of soft, chewy centers and crisp, minty edges creates an irresistible texture contrast. These double chocolate peppermint cookies treats stay fresh for up to five days when stored in an airtight container, though they rarely last that long!
No-Fuss Peppermint Cookie Storage Tips
Keep your peppermint cookies fresh and flavorful with smart storage tricks that preserve both taste and texture. Line airtight containers with wax paper to prevent cookies from sticking together, and place a slice of bread inside to maintain perfect moisture levels. For best results, store different varieties separately – the strong peppermint flavor can transfer to other cookies! Room temperature storage works great for 3-4 days, while freezing can extend freshness up to 3 months.
Just remember to thaw frozen cookies gradually in the fridge overnight. Pro tip: If your cookies start getting slightly soft, pop them in a 350°F oven for 3-5 minutes to crisp them back up. Always cool cookies completely before storing to prevent condensation, which can make them soggy. Stack them with parchment paper between layers to maintain their shape and prevent any frosting or toppings from getting smudged.
Gifting Peppermint Cookies: Creative Packaging Ideas
Want to share your peppermint cookies with loved ones? Transform simple treats into stunning gifts with creative packaging that preserves freshness and adds flair. Stack cookies in clear cellophane bags tied with red and white striped ribbon for a candy cane effect. Or pack them in vintage mason jars layered with festive tissue paper – the airtight seal keeps cookies fresh while creating an adorable display.
For shipping, cushion cookie layers with bubble wrap and mini marshmallows to prevent breakage. Add personalized gift tags with fun peppermint puns like “You’re MINT to have these!” Make cookie care packages extra special by including the recipe card, allowing friends to recreate these minty delights. For holiday cookie exchanges, arrange them in festive tins lined with holiday-themed cupcake liners. The presentation will be just as impressive as the cookies themselves!
Start Baking Your Perfect Peppermint Cookies Today
Ready to create these minty delights? Grab your mixing bowls and turn on that oven! Our tried-and-tested recipe guarantees cookies that’ll wow everyone at your next gathering. Click the “Print Recipe” button below for a printer-friendly version, or save it to your recipe box. Don’t forget to share your creations with us using #TalesRecipes!
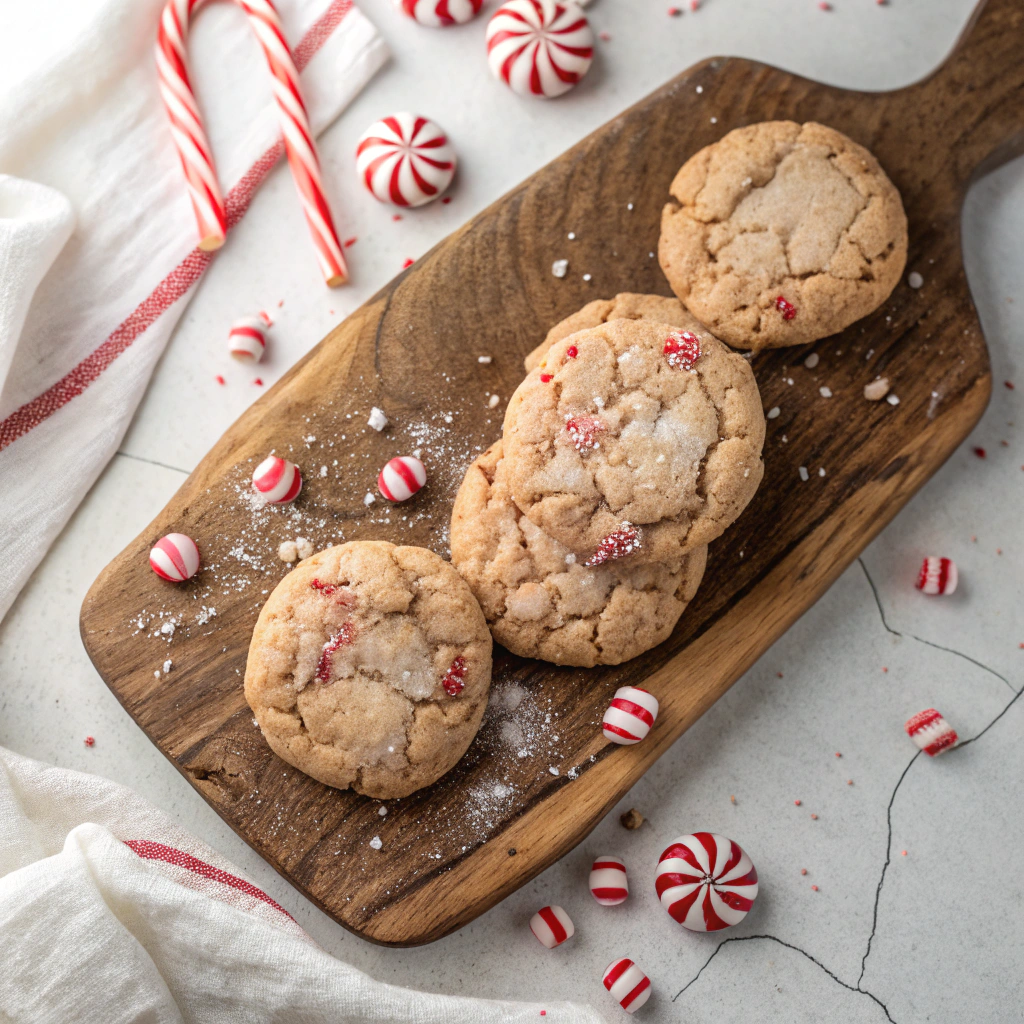
Peppermint Cookies
Buttery sugar cookies infused with refreshing peppermint and topped with crushed candy canes. These festive treats feature perfectly crisp edges and soft centers, making them ideal for holiday gatherings or gifting.
Ingredients
Cookie Dough:
Topping:
Instructions
Preparation:
- Whisk together flour, baking soda, and salt in a medium bowlEnsure even distribution of leavening agents
- Cream butter and sugar until light and fluffy, about 3 minutesMixture should be pale yellow and fluffy
- Beat in egg, peppermint extract, and vanilla extractMix until just combined
- Gradually add dry ingredients to wet mixtureStop mixing as soon as no flour streaks remain
- Cover dough and chill for 2 hoursDough should be firm to touch
Baking:
- Preheat oven to 350°F and line baking sheets with parchmentAllow oven to preheat for 15 minutes
- Roll dough into 1-inch balls, then coat in sugarDough balls should be uniform in size
- Place cookies 2 inches apart on prepared sheetsThey will spread during baking
- Bake for 11-13 minutes until edges are lightly goldenCenters should look slightly underdone
- Sprinkle crushed candy canes immediately on hot cookiesPress gently to adhere
- Cool on baking sheet for 5 minutes before transferringCookies will continue setting while cooling
Nutritional values
Servings: 24 ServingCalories:165kcalTotal Fat:7gSodium:95mgTotal Carbohydrate:24gDietary Fiber: 0.7gSugars: 15gProtein:1.5g
Note
Storage:
Store in airtight container at room temperature for up to 5 days
(Place wax paper between layers)
Freezing:
Freeze unfrosted cookies for up to 3 months
(Thaw overnight at room temperature)
Variations:
Chocolate Dipped: Half-dip cooled cookies in melted dark chocolate
Double Mint: Add ¼ cup mini chocolate chips to dough
Sandwich Style: Fill two cookies with peppermint buttercream
Common Issues:
Spreading Too Much: Dough wasn't chilled enough; return to refrigerator
Too Crispy: Reduce baking time by 1-2 minutes
Candy Cane Won't Stick: Apply while cookies are still hot from oven