Nutritional values
Servings: 12 ServingCalories:385kcalTotal Fat:29gSodium:280mgTotal Carbohydrate:28gDietary Fiber: 0.5gSugars: 22gProtein:5g

Y'all, let me tell you about my love affair with no-bake cheesecake! Last summer, when our AC broke during that awful heatwave, I refused to turn on my oven. That's when this creamy miracle saved my dessert-loving soul. Making the perfect no-bake cheesecake took some trial and error (and boy, do I have stories about floppy first attempts!), but I've finally cracked the code. The best part? This chilled treat is so much easier than traditional baked cheesecake. Trust me, once you've mastered this no-bake cheesecake recipe, you'll never look back. It's become my go-to for potlucks, family gatherings, or just those nights when I'm craving something sweet without breaking a sweat.
Let's talk cream cheese - the star of any no-bake cheesecake worth its salt! After testing pretty much every brand at my local grocery store (my family didn't complain about being taste-testers!), I've learned that full-fat Philadelphia cream cheese is hands-down the best choice. Store brands can work in a pinch, but they tend to be a bit watery, which can mess with your cheesecake's texture. Always, always let your cream cheese come to room temperature - I'm talking at least 2 hours on the counter. Cold cream cheese is the number one cause of lumpy no-bake cheesecake disasters. And please, don't even think about using low-fat versions unless you want a dessert that refuses to set properly!
While traditional no-bake cheesecake usually calls for graham crackers, I've discovered some amazing alternatives that'll make your dessert stand out. Oreo cookies (minus the filling) make an incredible chocolatey base - just pulse them fine in your food processor. My gluten-free friends swear by crushed almond cookies, and let me tell you, they're onto something! For a tropical twist, try using crushed vanilla wafers mixed with toasted coconut. The key to any crust is getting the butter-to-crumb ratio just right. Too much butter makes a greasy mess, while too little leaves you with a crumbly disaster. I always use the "squeeze test" - grab a handful and squeeze; it should hold together without being wet.
After countless no-bake cheesecake experiments (including one memorable pool party disaster), I've figured out the secret to perfect setting. Unflavored gelatin is your best friend here, but timing is everything! Bloom it properly in cold water first, then dissolve in a tiny bit of hot water before mixing it into your filling. For my vegetarian friends, agar agar powder works great as an alternative. Heavy whipping cream (whipped to stiff peaks) acts as a natural stabilizer too. Here's my pro tip: combining both gelatin and whipped cream creates the most foolproof no-bake cheesecake texture. Just remember to chill it overnight - rushing the setting process is a rookie mistake I've made too many times!
Creating the perfect no-bake cheesecake starts with a solid foundation - the crust! I learned this trick years ago when my oven broke during a summer heatwave. Simply crush your graham crackers into super-fine crumbs using a food processor or the trusty zip-lock bag method. Mix these crumbs with melted butter until they feel like wet sand. The key is getting the right butter-to-crumb ratio - too little and your crust falls apart, too much and it becomes greasy.
Press the mixture firmly into your springform pan using the bottom of a measuring cup. Make sure to work the crust slightly up the sides. Pop it in the fridge for at least 30 minutes before adding your filling. This chilling step is crucial for a sturdy base that won't crumble when sliced.
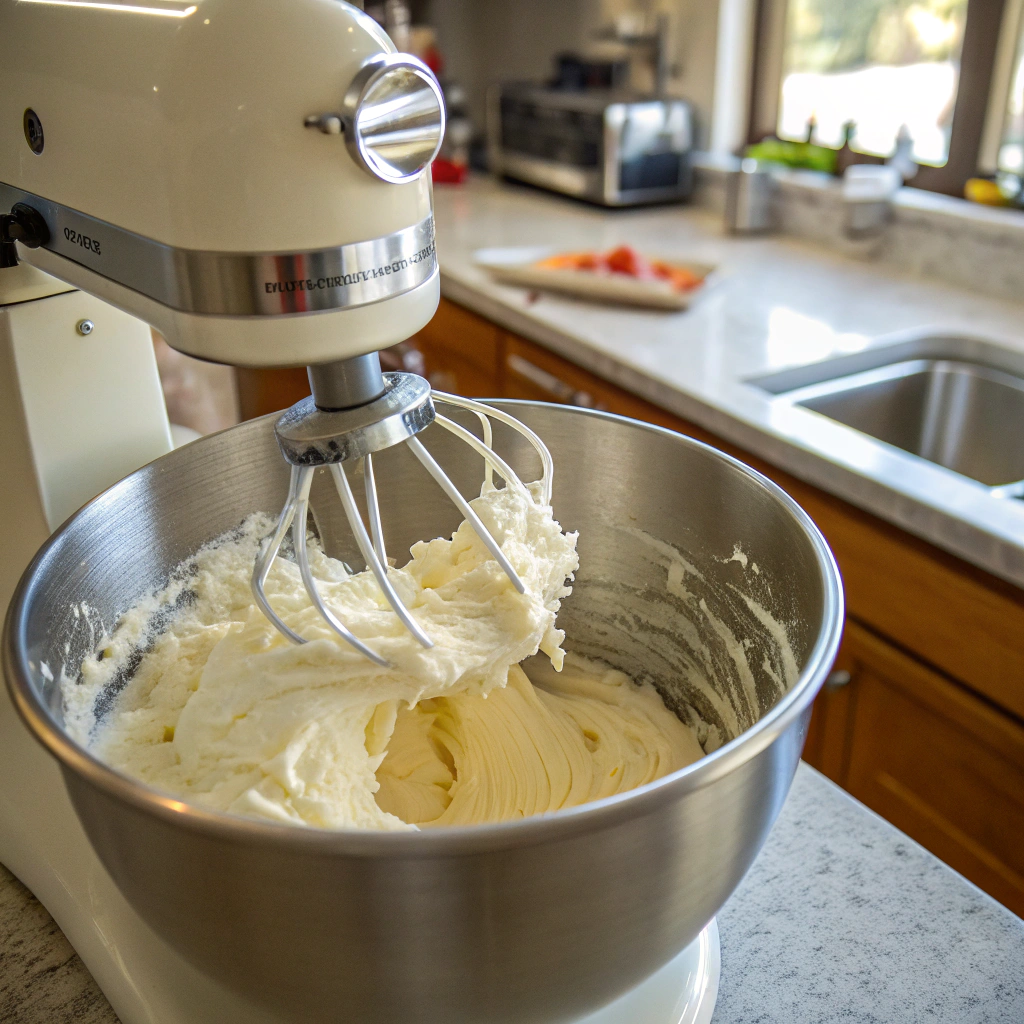
When making a no-bake cheesecake, temperature and timing are everything. Start with cream cheese that's properly softened - I leave mine out for about 2 hours before mixing. Beat it until completely smooth before adding other ingredients. Your heavy cream should be cold from the fridge for the best whipping results. I've found that gradually adding powdered sugar helps prevent lumps in the filling. The mixture should be thick enough to hold soft peaks but still spreadable. A common mistake with no-bake cheesecakes is under-mixing, which can lead to a grainy texture. Take your time here - scrape down the bowl's sides frequently and mix until everything is silky smooth.
Let me share some game-changing tips I've discovered while perfecting my no-bake cheesecake recipe. First, always strain your cream cheese mixture through a fine-mesh sieve - this extra step eliminates even the tiniest lumps. When incorporating whipped cream, fold it in gently using a rubber spatula rather than your mixer. This prevents over-beating and keeps the filling light and airy. Room temperature ingredients (except the cream) blend more smoothly, so plan ahead. I also recommend using full-fat cream cheese for the best texture. If you spot any lumps while mixing, press them against the bowl's side with your spatula. These small details make a huge difference in the final result.
Having trouble with your no-bake cheesecake setting properly? I've been there! The most common culprit is usually not giving it enough time in the fridge - this type of cheesecake needs at least 6 hours, but overnight is even better. Another reason could be using reduced-fat cream cheese, which contains more water and less fat. Make sure you're whipping your cream to stiff peaks before folding it into the cream cheese mixture. The temperature of your ingredients matters too - if they're too warm, the filling won't set properly. I always chill my mixing bowl and beaters before whipping the cream. Remember, a no-bake cheesecake should be firmly set but still have a slight wobble when gently shaken.
If your no-bake cheesecake filling seems too runny, don't panic! First, check if you've used the right amount of whipped cream - too much can make the filling loose. Sometimes adding a tablespoon of cornstarch to your powdered sugar can help stabilize the mixture. For a quick fix, try folding in some extra whipped cream that's been beaten to stiff peaks. Another trick I've learned is adding a small amount of unflavored gelatin to help with setting. If your filling is already in the pan, pop it in the freezer for about 30 minutes, then transfer it to the fridge. This can help jump-start the setting process without freezing the cheesecake solid.
A crumbly crust can really spoil your no-bake cheesecake experience. The secret lies in the right ratio of melted butter to cookie crumbs - typically about 1/4 cup butter per 1 1/2 cups of crumbs. Make sure your crumbs are finely ground; larger pieces can cause the crust to fall apart. Press the mixture firmly into your pan using steady, even pressure. I like using the bottom of a glass or measuring cup for this. Another tip: chill your crust for at least 30 minutes before adding the filling. If you're still having issues, try adding a tablespoon of sugar to the crumb mixture - it helps bind everything together. Always slice with a sharp, clean knife dipped in hot water.
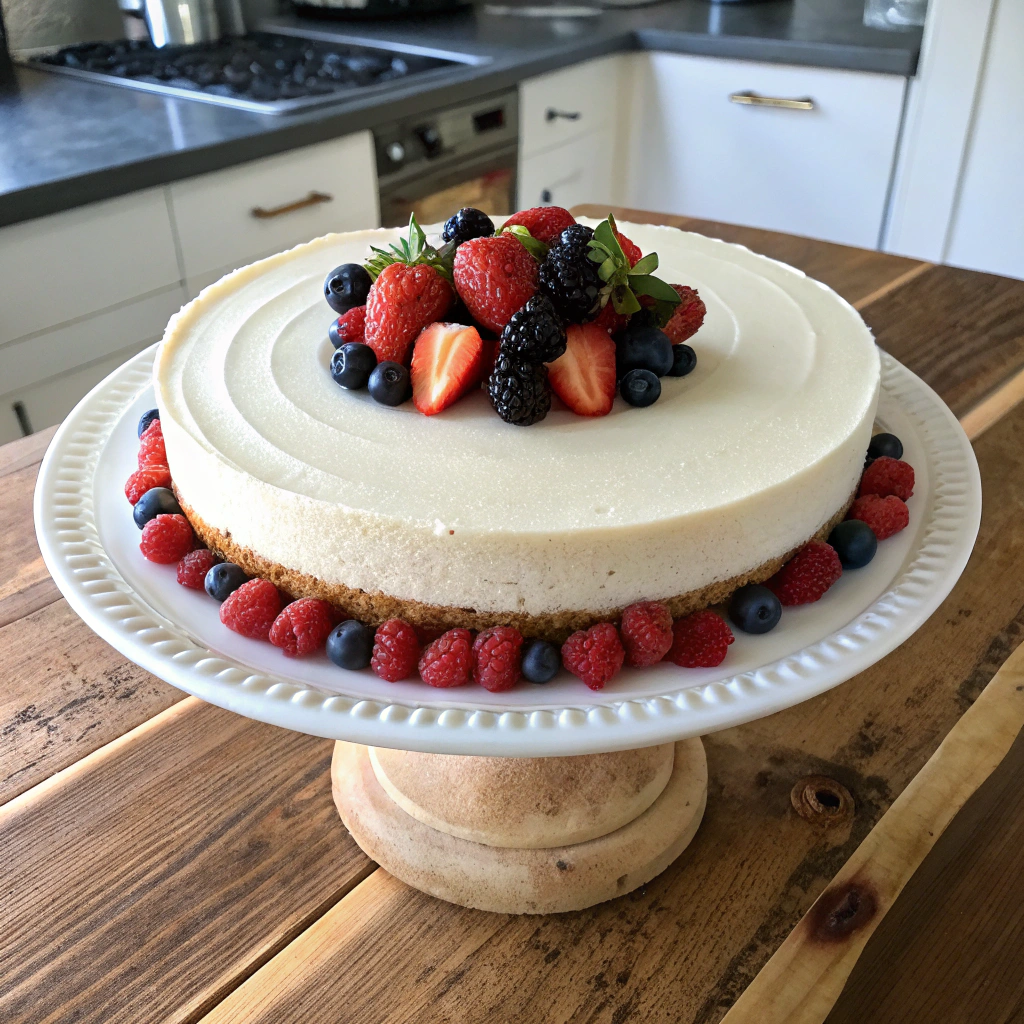
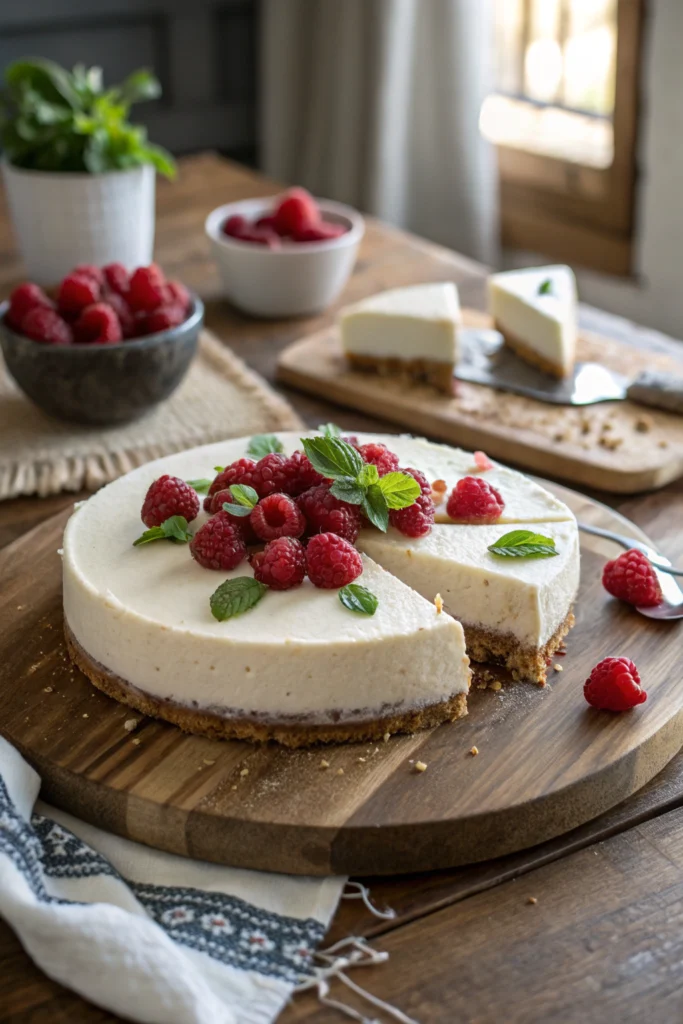
Let's talk about making your no-bake cheesecake pop with gorgeous fresh toppings! I love arranging sliced strawberries in a pretty pattern or creating a mixed berry medley. For summer parties, try layering fresh peach slices with a drizzle of honey - it's absolutely heavenly! The key to perfect fruit toppings is patting them dry before placing them on your no-bake cheesecake to prevent any excess moisture from making the surface soggy. I've learned that macerating berries (letting them sit with a bit of sugar) creates an amazing natural sauce. For a professional finish, brush fruit with warmed apricot jam for a beautiful shine. Don't forget about seasonal options - figs in fall and citrus in winter can make your dessert truly special.
Creating beautiful chocolate swirls in your no-bake cheesecake is easier than you might think! Start by dividing your base mixture, then blend melted dark chocolate into one portion. Drop spoonfuls of plain and chocolate mixture alternately into your crust, then use a knife to create gorgeous marbled patterns. My family goes crazy for this version! For extra decadence, try adding a layer of chocolate ganache on top. The trick to perfect swirls is making sure both mixtures have similar consistency. I've found that letting the melted chocolate cool slightly before mixing prevents it from seizing up. White chocolate works beautifully too, and you can even add food coloring for special occasions.
Making individual no-bake cheesecakes is perfect for parties and portion control! I love using small mason jars or dessert glasses - they look super cute and are easy to transport. The key to perfect mini servings is maintaining the right crust-to-filling ratio. I usually allow about 2-3 tablespoons of crust and 1/3 cup of filling per serving. A piping bag makes filling these little treats so much easier and neater. When making no-bake cheesecake minis, remember to leave some headroom at the top for toppings. Pro tip: chill your serving containers beforehand to help the filling set faster. These individual portions are ideal for customizing flavors to suit different tastes.
Your no-bake cheesecake can be a fantastic make-ahead dessert! For best results, freeze it without any toppings - you can add those fresh when serving. After your cheesecake has set in the fridge, wrap it carefully in plastic wrap, then add a layer of foil. A properly stored no-bake cheesecake keeps beautifully in the freezer for up to two months. I've found that slicing the cake before freezing makes it super convenient to grab individual portions later. Just remember to label your wrapped cheesecake with the date - trust me, this has saved me from mystery dessert situations more than once! For best texture, freeze the cake solid before wrapping to prevent squishing.
Choosing the right container makes all the difference when storing your no-bake cheesecake. I swear by springform pans with tight-fitting lids - they protect the top perfectly and keep other fridge smells out. If you're making a smaller version, consider using a glass container with a snap-on lid. For individual portions, reusable plastic containers work great, but make sure they're deep enough to prevent the tops from getting squished. When storing your no-bake cheesecake, avoid anything that might trap moisture or transfer flavors. Those disposable aluminum pans might be convenient, but they can affect the taste if stored too long.
Getting your frozen no-bake cheesecake ready to serve needs a bit of planning. Transfer it from freezer to fridge about 6-8 hours before serving time. If you're in a hurry, leaving it on the counter for 30 minutes after fridge-thawing helps achieve the perfect creamy texture. Always remove the wrapping while the cheesecake is still frozen to prevent damaging the surface. For the prettiest slices, dip your knife in hot water and wipe it clean between cuts.
For a delightful dessert pairing, try serving your no-bake cheesecake with easy chocolate mousse for a stunning dessert table spread. When serving your no-bake cheesecake, remember that it continues to soften at room temperature, so don't leave it out for more than 2 hours. Add any toppings just before serving for the freshest presentation
I can't wait to see your no-bake cheesecake creation! Tag us on Instagram @worldrecipes0 or share your photos in our Facebook group. Got questions? Drop them in the comments below – I love helping fellow bakers troubleshoot. Don't forget to check out our other no-bake dessert recipes for more summer treats. Join our monthly newsletter for exclusive tips and seasonal recipe ideas. Let's keep the oven off and the delicious desserts coming!
A perfectly creamy, cloud-like cheesecake that sets up beautifully in the fridge. This foolproof recipe features a buttery graham cracker crust topped with a velvety cream cheese filling that's ideal for hot summer days or when you need a quick dessert solution.
Servings: 12 ServingCalories:385kcalTotal Fat:29gSodium:280mgTotal Carbohydrate:28gDietary Fiber: 0.5gSugars: 22gProtein:5g
Storage Instructions:
Store covered in refrigerator for up to 5 days. Can be frozen for up to 2 months - wrap tightly in plastic wrap and foil.
Serving Suggestions:
Top with fresh berries, whipped cream, or caramel sauce. Serve chilled. For clean slices, dip knife in hot water between cuts.
Recipe Notes:
For best results, use full-fat cream cheese at room temperature
Substitute graham crackers with vanilla wafers or chocolate cookies
Skip gelatin by increasing cream cheese to 32 oz and extending chill time
Let cheesecake sit at room temperature for 10 minutes before serving