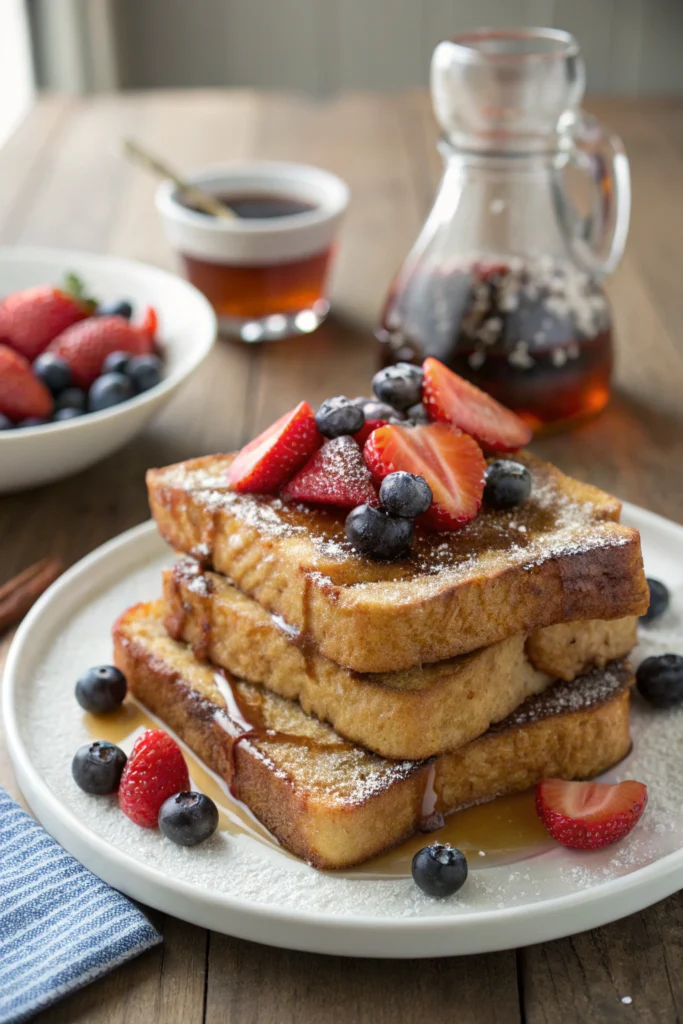
Oh my goodness, can we talk about French toast for a minute? Last Sunday, while my kids were still snoozing, I had this magical moment in my kitchen. The sun was streaming through my window, coffee was brewing, and I was transforming a leftover brioche loaf into the most incredible brioche French toast ever.
You know those breakfast memories that stick with you? This is totally one of them! After years of making French toast (and trust me, I’ve had my share of soggy disasters), I’ve finally cracked the code for perfect brioche French toast. The secret? It’s all about starting with the right bread, and brioche is absolutely the game-changer here.
Why Brioche Makes the Best French Toast
The Magic of Brioche's Butter-Rich Texture
Let me tell you, the first time I used brioche for French toast, it was like a lightbulb moment! The bread’s rich, buttery nature creates this amazing canvas that soaks up the egg mixture just right – not too much, not too little.
Picture this: each slice of brioche has these tiny, tender air pockets that were created by all that butter in the dough. When you dip it in the custard mixture, these little pockets become flavor traps, holding onto all that vanilla-y, cinnamon-y goodness. My daughter calls them “taste bubbles,” and honestly, that’s the perfect description!
Regular Bread vs. Brioche: The Tasty Truth
Look, I’ve tried every bread under the sun for French toast – sandwich bread, challah, even that fancy artisan sourdough from the farmer’s market. But there’s something special about brioche that puts it in a league of its own for making the best French toast.
Regular bread tends to get soggy super fast, while sourdough can be too chewy. Brioche? It hits that sweet spot right in the middle. It’s sturdy enough to hold up to a good soak in the egg mixture but tender enough to melt in your mouth. Plus, that extra richness from the butter and eggs in the bread itself? Pure breakfast magic!
Finding the Perfect Brioche Loaf
Here’s a pro tip I learned after one too many grocery store runs: not all brioche is created equal for making French toast! I typically grab mine from our local bakery (shout out to Marie’s on Oak Street!), but the brioche from Trader Joe’s works great in a pinch.
The key is finding a loaf that’s fresh but not too fresh – day-old is actually perfect for brioche French toast. And thickness matters, folks! You want to slice it about 3/4 inch thick – too thin and it falls apart, too thick and you’ll get that dreaded raw middle. If you’re buying pre-sliced, just check that the slices aren’t squished or compressed.
Essential Tips for Brioche French Toast Success
The Perfect Brioche French Toast Batter Ratio
Getting your batter ratio right can make or break your brioche French toast. Through years of Sunday morning experiments, I’ve found that 2 large eggs per 1/2 cup of whole milk creates the ideal custard consistency.
Add 1 tablespoon of vanilla extract and a pinch of cinnamon – this combination gives you a rich base without overwhelming the brioche’s natural buttery flavor. A tiny sprinkle of salt (about 1/4 teaspoon) brings out the sweetness without making the brioche French toast taste salty.
Pro tip: room temperature eggs and milk blend much better than cold ingredients straight from the fridge. I learned this the hard way after countless lumpy batters!
Temperature Matters: Pan and Butter Tips
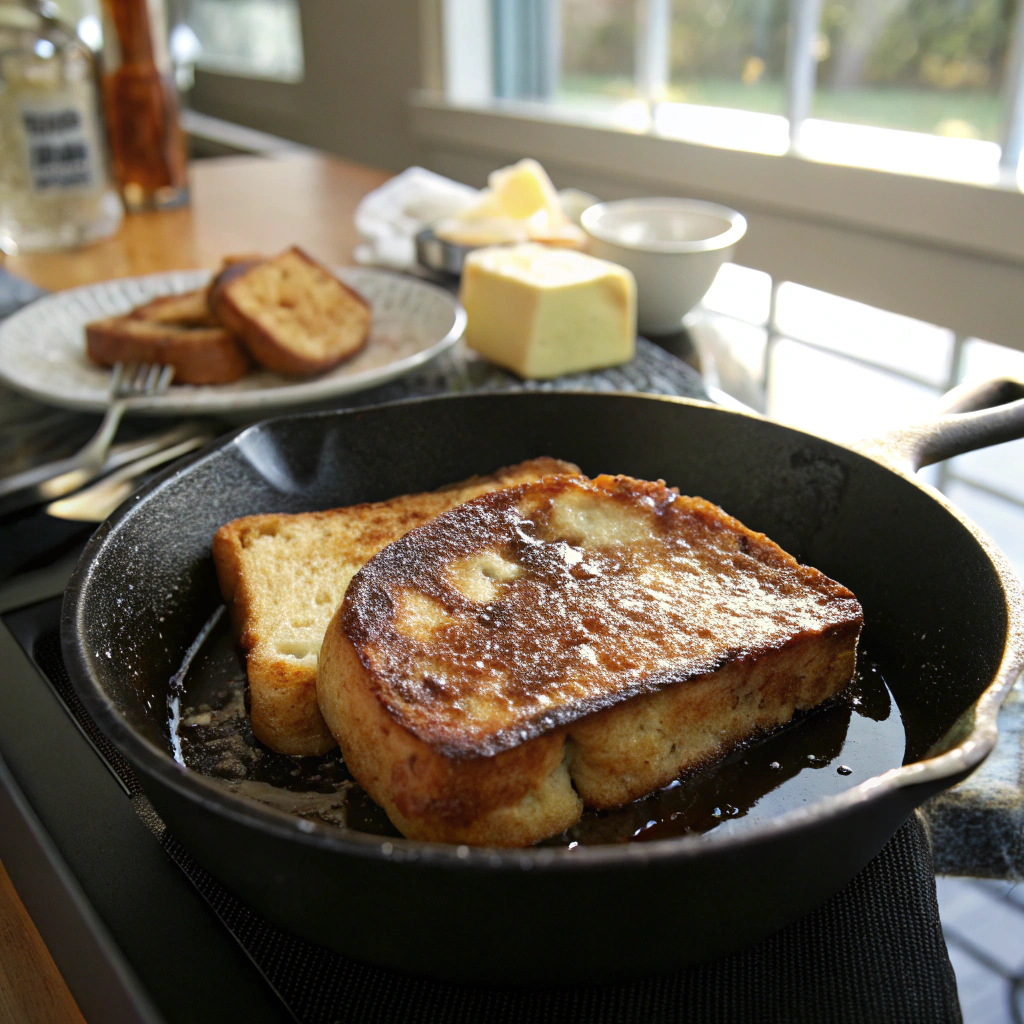
Here’s something I wish someone had told me years ago: medium-low heat is your best friend when making brioche French toast. I used to crank up the heat, ending up with burnt outsides and soggy middles.
Now I start with a cold pan and let it warm up gradually. Test the temperature by adding a small pat of butter – it should sizzle gently, not brown instantly. I love using clarified butter because it won’t burn as quickly as regular butter. If you don’t have clarified butter, mix equal parts butter and neutral oil. This combo gives you that wonderful buttery taste while preventing the dreaded burnt spots.
Soaking Time Secrets
The soaking time can make the difference between okay and amazing brioche French toast. Thick-cut brioche (about 1-inch slices) needs 20-30 seconds per side – just enough time to soak up the custard without becoming too heavy.
Watch the bread carefully; when it feels slightly heavy but doesn’t break apart when lifted, it’s ready. During holiday brunches, I prep a dipping station: one shallow dish for soaking and another for the waiting slices. Don’t rush this step! If you’re making a big batch, soak your slices in batches rather than all at once. They’ll get mushy if they wait too long.
Crafting Your Brioche French Toast Base
Mixing Your Custard Base
Let’s talk about creating that perfect custard base for brioche French toast. Start by cracking your eggs into a wide, shallow bowl – this makes dipping so much easier than using a regular mixing bowl.
Whisk the eggs until they’re completely blended, no streaks of white showing. Now, pour in your milk in a steady stream while whisking constantly. This prevents those annoying egg strands from forming. Add your vanilla and spices last. I like adding a tiny splash of almond extract too – it’s my secret weapon!
Some mornings, I’ll mix this up the night before and store it covered in the fridge. Just give it a good whisk before using.
Best Brioche Slicing Techniques
Slicing brioche properly makes a huge difference in your brioche French toast game. Let the loaf sit out for about 15 minutes before cutting – slightly stale bread actually works better than super fresh.
Use a serrated knife and gentle sawing motions rather than pressing down hard. Aim for slices between 3/4 to 1 inch thick. Too thin, and they’ll fall apart; too thick, and the middle stays raw. If your brioche is super fresh, pop the slices in a 200°F oven for 10 minutes to dry them slightly. This helps them soak up more custard without falling apart.
Signs Your French Toast is Ready to Flip
Knowing when to flip is crucial for perfect brioche French toast. Look for these telltale signs: the edges should start to look set, and the bottom should be golden brown (peek carefully with your spatula). You’ll notice tiny bubbles forming around the edges – that’s your cue! The top surface will still look wet but shouldn’t be liquid-y.
Each side typically needs 3-4 minutes on medium-low heat. Don’t press down with your spatula – this squeezes out the custard. Use a thin spatula and flip confidently in one smooth motion. The second side usually cooks faster than the first.
Classic Brioche French Toast Toppings
Traditional Maple and Butter Combos
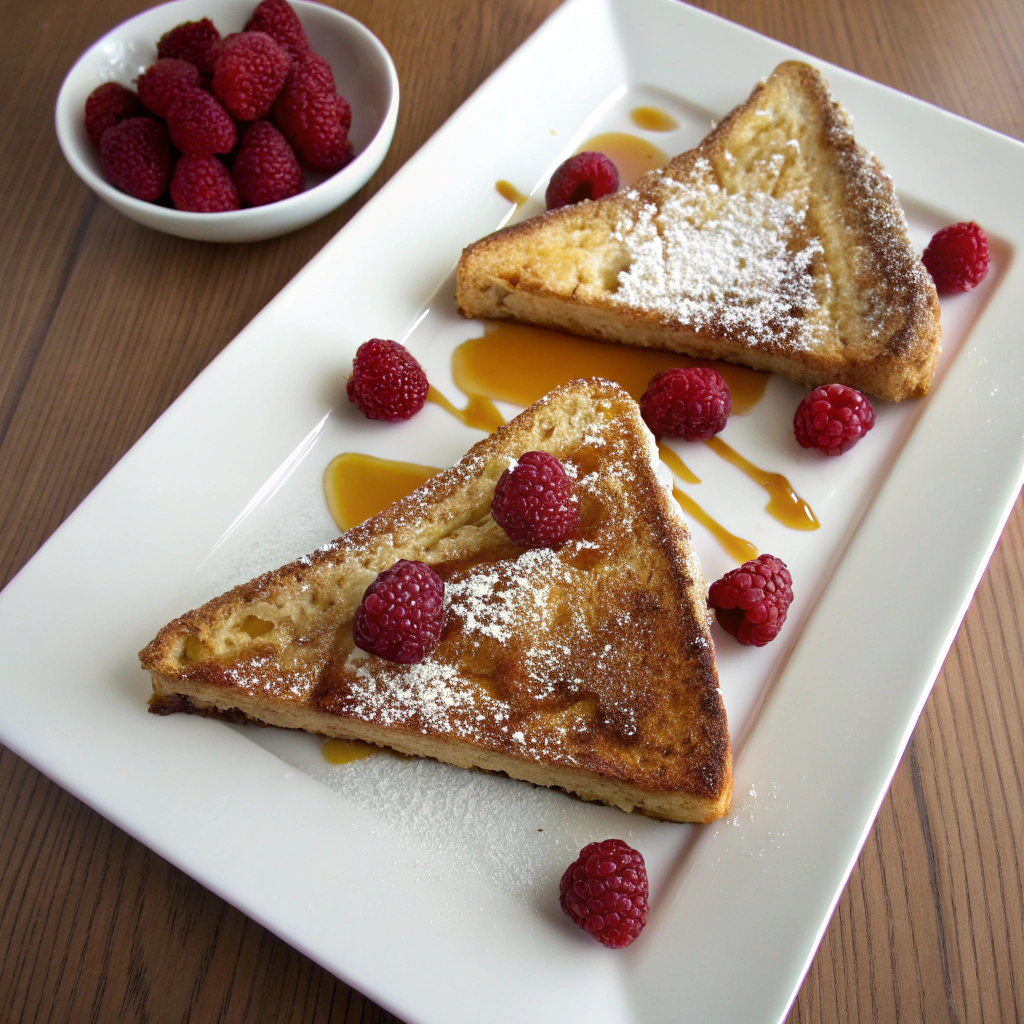
Nothing beats the classic combo of real maple syrup and melted butter on brioche French toast. I love warming my maple syrup in a small pitcher for about 30 seconds in the microwave – it helps it flow better and keeps your brioche French toast warm longer.
For the butter, I slice it thin and let it melt naturally on the hot toast. My grandma’s trick was adding a tiny pinch of sea salt to the melted butter for extra flavor depth. While premium maple syrup can be pricey, it’s worth splurging on the real stuff – those artificial syrups just don’t compare. Pro tip: Keep a jar of cinnamon-sugar handy to sprinkle on before the syrup!
Fresh Fruit Pairings for French Toast
Fresh fruits take brioche French toast from good to amazing! During summer, I pile on fresh berries – strawberries, blueberries, and raspberries are my go-to choices. In fall, try thin-sliced apples or pears quickly sautéed with cinnamon.
Bananas work year-round and caramelize beautifully if you give them a quick pan-fry in butter. For a tropical twist, try mango chunks with a sprinkle of lime zest. My kids love when I make fruit faces on their brioche French toast! To keep berries fresh longer, don’t wash them until you’re ready to use them. A quick honey drizzle over any fruit adds extra sweetness.
Creative Brioche Toast-Topping Ideas
Let’s think outside the maple syrup bottle! Try spreading Nutella and adding sliced almonds, or go savory with cream cheese and everything bagel seasoning. My family loves “dessert for breakfast” with vanilla ice cream and a drizzle of chocolate sauce for special occasions.
Lemon curd and fresh whipped cream make an elegant brunch option. For a fall twist, try pumpkin butter with pecans and a dash of nutmeg. Cream cheese frosting with crumbled graham crackers gives you cheesecake vibes. Even simple peanut butter with sliced bananas and a honey drizzle can transform your brioche French toast into something special.
Make-Ahead Brioche French Toast Tips
Overnight French Toast Prep Guide
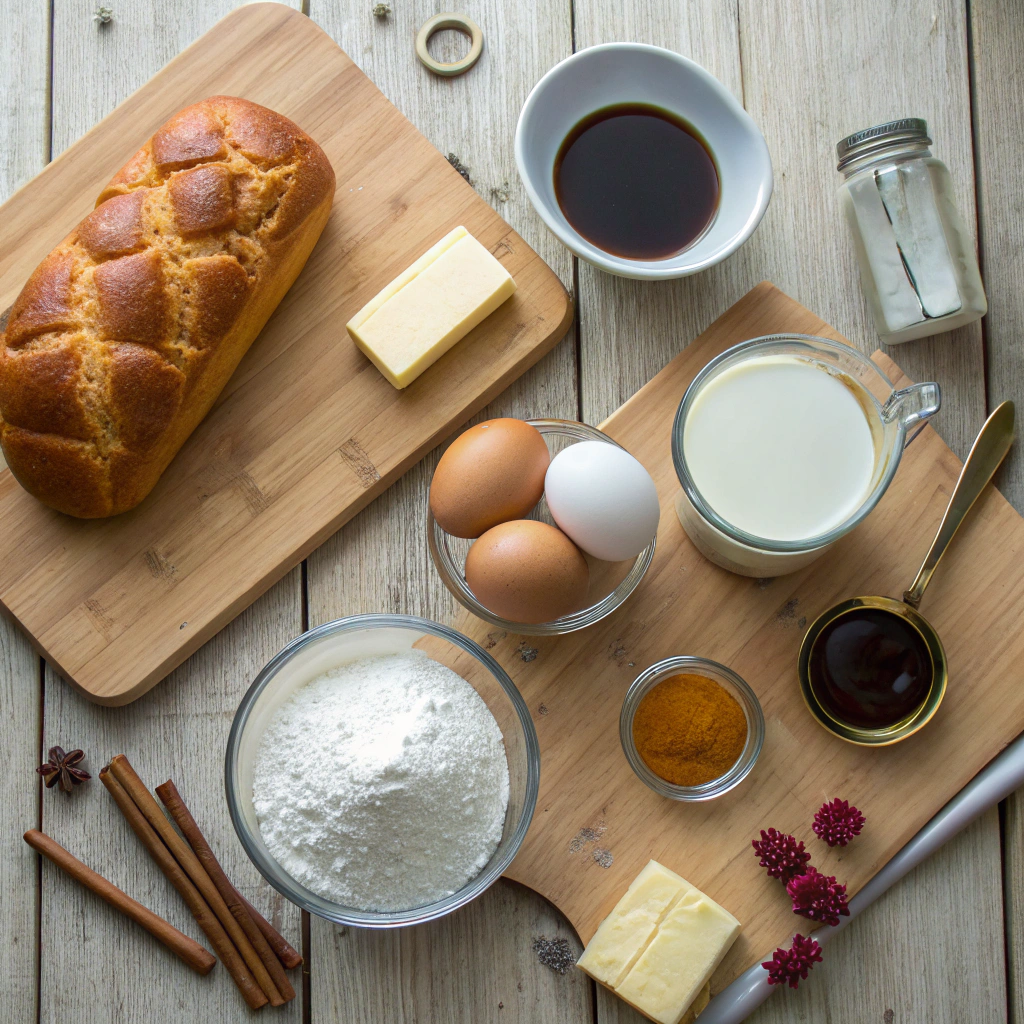
Making brioche French toast for a crowd? Prep the night before! Slice your brioche and lay the pieces out on a baking sheet to dry slightly overnight – this helps them soak up more custard without falling apart.
Mix your egg mixture (I use eggs, heavy cream, vanilla, and a pinch of nutmeg) and store it covered in the fridge. You can even prep toppings like washed berries or chopped nuts. My time-saving trick: pre-measure ingredients and line them up in order. Set out your cooking tools, griddle, and serving platters too. Come morning, you’ll feel like a cooking show host with everything ready to go!
Storing Your Brioche French Toast
Let’s talk storage – because leftover brioche French toast can be just as good! Cool completely before storing to prevent sogginess. Layer pieces between wax paper in an airtight container. They’ll keep in the fridge for up to 3 days.
For longer storage, freeze for up to 2 months. I like to freeze individual portions on a baking sheet first, then transfer them to a freezer bag – this prevents them from sticking together. Label everything with dates! If you’re meal prepping, consider making a double batch. Having ready-to-heat brioche French toast makes busy mornings so much easier.
Reheating Without Losing the Magic
Don’t let reheating ruin your beautiful brioche French toast! For refrigerated pieces, pop them in the toaster on low – this restores that crispy outside while keeping the inside soft. From frozen, let them thaw overnight in the fridge first.
For multiple servings, arrange them on a baking sheet and warm in a 350°F oven for about 10 minutes. Avoid the microwave if possible – it can make them rubbery. My secret weapon? A quick butter brush before reheating adds moisture and flavor. Don’t forget to warm your toppings separately for that fresh-made taste!
Ready to Make Your Own Brioche French Toast?
Quick Recipe Summary
Got everything you need? Remember: slightly stale brioche, room temperature eggs, and patience with the cooking temperature. Start with one slice to test your heat level.
Share Your French Toast Creation
Tag us on Instagram @Worldrecipes0 with your brioche French toast creation! We love seeing your breakfast masterpieces and hearing about your own twists on this recipe.
Join Our Breakfast Club
For a complete breakfast spread, try serving this brioche French toast alongside a hearty Sweet Potato and Egg Skillet for a delicious contrast of flavors. Sign up for our weekly newsletter to get more breakfast recipes, tips, and tricks for making the best brioche French toast. Plus, you’ll be the first to know about our upcoming virtual cooking classes. Let’s make breakfast special together!
Brioche French Toast
Rich, custardy brioche French toast that's golden-crisp outside and pillowy-soft inside. This recipe transforms simple brioche bread into an indulgent breakfast treat with just the right balance of vanilla and cinnamon. Perfect for lazy weekend mornings or special brunch occasions.
Ingredients
For the French Toast:
For Serving:
Instructions
Prepare the Custard Base
- Whisk eggs in a wide, shallow bowl until fully blended
- Add milk, vanilla, sugar, cinnamon, and salt
- Whisk until completely smoothTip : Use room temperature ingredients for better blending
Soak the Brioche
- Dip each slice of brioche in custard mixture
- Soak for 20-30 seconds per side
- Let excess drip offSuccess indicator: Bread should feel heavy but not falling apart
Cook the French Toast
- Heat a large skillet over medium-low heat
- Add 1 tablespoon butter
- Cook 2-3 slices at a time, 3-4 minutes per side
- Look for golden brown colorSuccess indicator: Edges should be set and slightly crispy
Keep Warm and Serve
- Place cooked slices on a baking sheet in 200°F oven
- Repeat with remaining slices
- Serve with maple syrup, fresh berries, and butterTip: Dust with powdered sugar just before serving
Nutritional values
Servings: 6 ServingCalories:385kcalTotal Fat:19gSodium:380mgTotal Carbohydrate:42gDietary Fiber: 1gSugars: 18gProtein:12g
Note
Storage:
Keep leftovers in an airtight container for up to 3 days. Reheat in toaster or 350°F oven for 5-7 minutes.
Substitutions:
Use challah bread if brioche unavailable. For dairy-free version, use almond milk and coconut oil for cooking.
Serving Suggestion:
Create a French toast bar with various toppings like fresh fruits, nuts, whipped cream, and different syrups.


