Nutritional values
Servings: 4 ServingCalories:460kcalTotal Fat:32gSodium:980mgTotal Carbohydrate:25gDietary Fiber: 2gSugars: 4gProtein:28g

Y'all, let me tell you about my obsession with Blackstone smash burgers! Last summer, I finally caved and bought a Blackstone griddle after watching my neighbor Dave make the most incredible crispy-edged burgers I'd ever seen. After countless test runs (and a few smoky failures), I've nailed down the technique for making restaurant-style griddle burgers right in my backyard. Making Blackstone smash burgers isn't rocket science, but there are some tricks that'll take your burger game from "pretty good" to "everybody's inviting themselves over for dinner." Trust me, once you master these basics, you'll never look at a regular burger the same way again. Let's dive into everything you need to get started!
Listen up, because this might be the most important gear decision you'll make for your Blackstone smash burgers! I learned the hard way that those flimsy plastic spatulas just won't cut it. You'll want a heavy-duty metal spatula with a really sharp edge – I'm talking the kind that means business. My go-to is a 6-inch stainless steel spatula with a nice long handle to keep my hands away from the heat. For smashing, I started with a bacon press, but honestly? A dedicated burger smasher is worth every penny. The wide, flat surface gives you that perfect crispy edge that makes griddle burgers so dang irresistible. Just make sure whatever you choose is sturdy enough to really lean into.
Getting your Blackstone smash burgers just right is all about temperature control. I can't tell you how many burgers I overcooked before investing in a good infrared thermometer – it's been a total game-changer! You want that griddle surface hitting around 400°F for the perfect crust. An instant-read meat thermometer is another must-have for checking those patties. When I'm making smash burgers for a crowd, I keep both thermometers handy and check my griddle zones regularly.
The Blackstone can develop hot spots, especially if you're cooking in windy conditions. While mastering your burger technique, it's helpful to know how to clean your griddle properly between batches for consistent results. Don't forget some heat-resistant gloves too – those metal handles can get mighty toasty during a long burger session!
Beyond the basics, there are some accessories that'll make your Blackstone smash burgers way easier to nail consistently. First up, grab yourself a good grease management system – those smashed patties release a lot of fat! I keep a dedicated scraper and some griddle cleaning bricks nearby for quick cleanup between batches. A squeeze bottle filled with water helps manage flare-ups and makes cleaning easier. Don't forget about your mise en place – I use these awesome stainless steel condiment cups to keep my seasonings and toppings organized right next to the griddle. Oh, and invest in a decent griddle cover if you're keeping your Blackstone outside. Trust me, protecting that cooking surface is crucial!
For amazing Blackstone smash burgers, the meat-to-fat ratio is crucial. I've found that 80/20 ground beef gives you that perfect balance of flavor and juiciness. When making smash burgers on the griddle, you want enough fat to create those crispy edges everyone loves. The fat content also helps prevent the patties from drying out during the high-heat cooking process. I always get my meat from a local butcher who grinds it fresh daily - it makes such a difference! If you're feeling adventurous, try mixing in some ground chuck or brisket for extra flavor. Just remember, the key to juicy griddle burgers is having enough fat to create that amazing crust while keeping the inside tender.
Creating the perfect Blackstone smash burgers starts with loosely forming 2-ounce meat balls. Don't overwork the meat - that's a rookie mistake I made when first starting out with griddle cooking. Place your meatball on the hot Blackstone surface (around 400°F) and let it sit for about 30 seconds. Then comes the fun part - using your smashing tool, press down firmly and evenly to create a thin patty. I love watching those edges get super crispy on the griddle! Make sure your spatula or press is really flat to get that even smash. The thinner the patty, the more delicious caramelization you'll get.
The secret to perfect Blackstone smash burgers lies in the timing. Once you've smashed your patty, let it cook for about 60-90 seconds. You'll see the edges getting beautifully crispy and brown - that's your cue! When flipping these griddle burgers, use a sharp spatula to scrape up all those crispy bits. They're flavor gold! After the flip, add your cheese right away if you're making cheeseburgers. The second side only needs about 30-45 seconds to finish cooking. Remember, these thin patties cook quickly on the hot griddle surface, so keep a close eye on them.
When crafting Blackstone smash burgers, your choice of beef makes all the difference. I like mixing different cuts - usually a combination of chuck, sirloin, and brisket creates the ultimate flavor profile. The chuck brings richness, while sirloin adds a clean beef taste, and brisket contributes that extra bit of fat for perfect griddle searing. Have your butcher grind it fresh if possible. Some folks swear by adding a bit of short rib to their burger blend. I've tested countless combinations on my Blackstone, and this mix consistently delivers those restaurant-quality results we're all after.
For knockout Blackstone smash burgers, I've developed a seasoning blend that's become my signature. Start with kosher salt and fresh ground black pepper as your base. Add a touch of garlic powder and onion powder for depth. Here's my secret: a pinch of smoked paprika adds incredible flavor to these griddle burgers. Season your meat just before cooking - never mix seasonings into the ground beef. When those spices hit the hot Blackstone surface, they create an amazing crust that'll have everyone asking for your recipe.
No Blackstone smash burgers are complete without an amazing sauce. My go-to recipe combines mayo, diced pickles, ketchup, and a splash of pickle juice for tang. Add some finely minced onion and a dash of garlic powder for extra flavor. This sauce perfectly complements the crusty exterior of griddle-cooked burgers. I always make extra because everyone wants more! Let the sauce sit in the fridge for at least an hour before serving - it lets the flavors meld together beautifully. The sauce keeps well for about a week, making future burger nights even easier.
Making perfect Blackstone smash burgers starts with understanding your griddle's temperature zones. I've learned through countless burger sessions that the left side of my Blackstone runs slightly hotter than the right. This knowledge helps me create consistently amazing smash burgers by positioning patties strategically. Keep a spray bottle of water handy to test your hot spots - the droplets should dance and evaporate quickly on properly heated surfaces. For the best Blackstone smash burgers, aim for a temperature between 375-400°F in your main cooking zone. I like to keep one corner slightly cooler for toasting buns without burning them.
The signature crust on Blackstone smash burgers comes from proper technique and timing. Start with loosely formed meat balls - I prefer 80/20 ground beef for the ideal fat content. Once your griddle is screaming hot, place the meat ball down and immediately smash it with firm, even pressure. The key to amazing smash burgers on the Blackstone is pressing them super thin - about ¼ inch thick. Let them cook undisturbed for about 2 minutes until you see the edges getting crispy. A proper spatula is crucial here - I use a heavy-duty metal one that won't flex when smashing.
When making Blackstone smash burgers, proper cheese melting technique is crucial for that perfect finish. After flipping your patty, immediately add your cheese of choice - I find American cheese melts most consistently, though sharp cheddar creates amazing flavor. To speed up melting on your smash burgers, try this griddle master trick: add a small splash of water next to (not on) the patty and quickly cover it with a dome lid. The steam created will melt your cheese perfectly in about 30 seconds. This technique works especially well when cooking multiple burgers at once.
The foundation of great Blackstone smash burgers starts with the right bun. I've discovered that potato rolls provide the perfect combo of softness and structure to handle these thin, crusty patties. Before cooking your smash burgers, brush the bun interiors lightly with butter and toast them on a cooler section of your Blackstone. This creates a protective barrier that prevents soggy buns while adding extra flavor. Keep the toasted buns warm by stacking them on a plate covered with a clean kitchen towel. The residual heat from your Blackstone will help maintain their perfect temperature.
Building the perfect Blackstone smash burgers is an art form that starts from the bottom up. Begin with your toasted bottom bun and add a swipe of sauce - I like a mix of mayo and mustard for my smash burgers. Next comes shredded lettuce, which helps catch any delicious juices. Place your perfectly crusted patty with melted cheese next, followed by thin-sliced tomatoes and pickles. When assembling multiple smash burgers, I keep my Blackstone running to ensure everything stays warm. The top bun gets a final sauce swipe before closing these masterpieces. For a refreshing side dish to complement your burgers, try this fresh cantaloupe summer salad that perfectly balances the rich flavors.
Let me share my favorite Blackstone smash burger combinations that'll make your mouth water. First up is the Classic: American cheese, lettuce, tomato, and special sauce. The Mushroom Swiss smash burger features sautéed mushrooms and aged Swiss cheese. For heat lovers, try the Spicy Southwest with pepper jack, jalapeños, and chipotle mayo. The Bacon Blues combines crispy bacon and blue cheese with caramelized onions. Finally, my signature Blackstone breakfast smash burger tops things off with a fried egg, bacon, and maple aioli. Each combination works perfectly with the crusty patties from your griddle.
Share Your Smash Success Stories
Ready to master Blackstone smash burgers? Start with these tips, then make them your own. I'd love to hear about your griddle adventures in the comments below. Share your favorite toppings, seasoning blends, or how you achieved that perfect crust. Whether you're a beginner or seasoned pro, every burger story adds to our community knowledge. Let's keep griddling together!
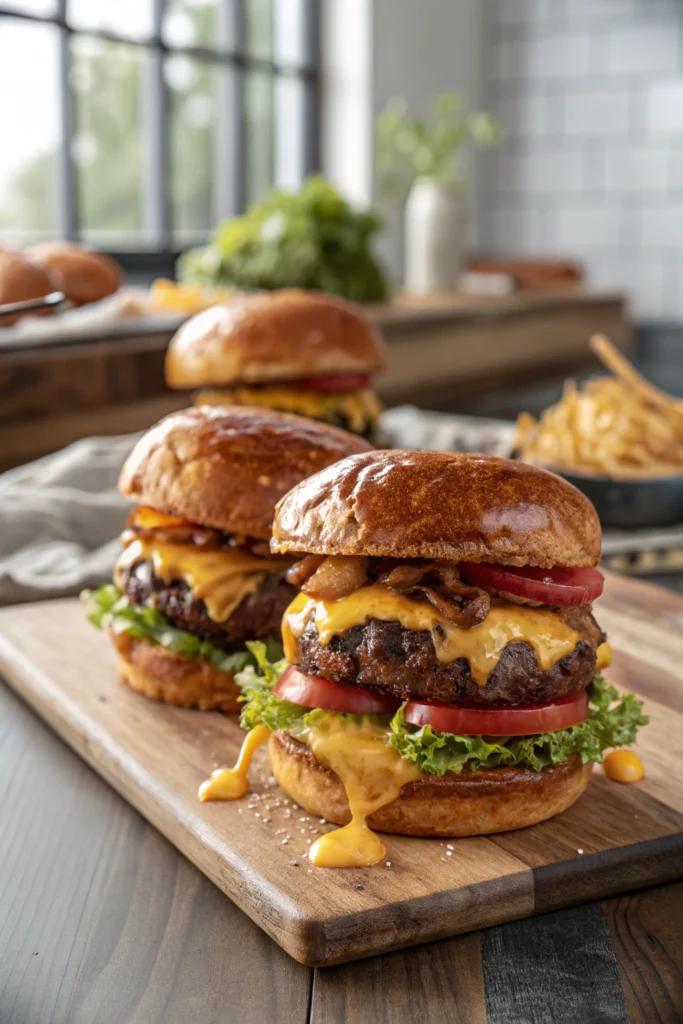
These restaurant-style smash burgers cooked on a Blackstone griddle feature ultra-crispy edges and juicy centers. The high-heat searing technique creates an irresistible crust while keeping the inside tender and flavorful.
Servings: 4 ServingCalories:460kcalTotal Fat:32gSodium:980mgTotal Carbohydrate:25gDietary Fiber: 2gSugars: 4gProtein:28g
Storage Tips:
Serve burgers immediately for best results
Store uncooked meat balls up to 24 hours in refrigerator
Keep special sauce refrigerated up to 1 week
Don't store assembled burgers
Substitutions:
Ground chuck or brisket can replace regular ground beef
Swiss or cheddar can replace American cheese
Brioche buns can replace potato buns
Greek yogurt can replace mayonnaise in sauce
Serving Suggestions:
Serve with crispy french fries
Add bacon for extra flavor
Pair with cold beer or milkshake
Great for backyard gatherings