Have you ever struggled to cook quinoa just right? I know I did until I discovered these game-changing techniques! As a protein-packed superfood, quinoa deserves to be cooked to perfection every time. Whether you’re meal prepping for the week or whipping up a quick dinner, mastering how to cook quinoa is essential for creating light, fluffy grains that aren’t mushy or bitter.
Let me share my tried-and-true method that transformed my quinoa from bland and soggy to restaurant-quality delicious. After countless test runs in my kitchen (and yes, a few memorable failures!), I’ve nailed down the exact water-to-grain ratio and timing that works like magic. Plus, I’ll reveal my favorite pre-cooking trick that removes any trace of bitterness.
Why Quinoa is Your Ultimate Grain Choice ?
Nutritional Profile and Health Benefits
When you cook quinoa, you’re preparing one of nature’s most complete protein sources. Unlike other grains, quinoa packs all nine essential amino acids your body needs. I discovered this superfood’s magic during my postpartum recovery when I needed quick, nutritious meals. Just one cup of cooked quinoa delivers 8 grams of protein, 5 grams of fiber, and loads of iron and magnesium. Plus, it’s naturally gluten-free!
What really makes quinoa stand out is its impressive antioxidant content. Those tiny grains are bursting with quercetin and kaempferol, which help fight inflammation. My family loves how light yet filling it feels compared to rice or pasta. The best part? Its gentle, nutty flavor makes it perfect for both sweet and savory dishes. Whether you’re watching your weight or boosting your energy, quinoa fits seamlessly into any healthy eating plan.
Ancient Origins and Modern Popularity
Did you know quinoa has been around for over 5,000 years? The Incas called it “the mother of all grains” and used it to cook quinoa for their warriors. Fast forward to today, and this ancient superfood has taken modern kitchens by storm.
I remember my first encounter with quinoa at a local farmers’ market in 2010 – back then, hardly anyone could pronounce it correctly! Now, it’s become a pantry staple in households worldwide. What’s fascinating is how this humble Andean crop made its journey from South American highlands to global fame.
Thanks to NASA’s space food research in the 1990s, quinoa got a major spotlight for its exceptional nutritional value. These days, you’ll find it in everything from breakfast bowls to gourmet restaurant menus. Peru and Bolivia still lead production, but farmers worldwide are catching up to meet growing demand.
Comparing Quinoa Types: White, Red, Black
When you cook quinoa, it’s helpful to know the differences between varieties. White quinoa has a mild, nutty flavor and becomes fluffy in about 15 minutes. It’s perfect for quinoa newbies! Red quinoa keeps its shape better and has a richer, earthier taste that really shines in cold salads.
I discovered black quinoa last summer at a local co-op, and wow – it’s got this amazing crunch and slightly sweet flavor. In my kitchen, I often mix types for exciting textures and colors. While white quinoa works great in breakfast porridge, red holds up beautifully in buddha bowls, and black adds dramatic flair to dinner sides.
Each variety has slightly different cooking times too – black typically needs an extra 5 minutes. Just remember, regardless of color, that signature spiral tail always tells you when it’s done!
Step-by-Step Quinoa Cooking Method
Proper Rinsing and Measuring Techniques
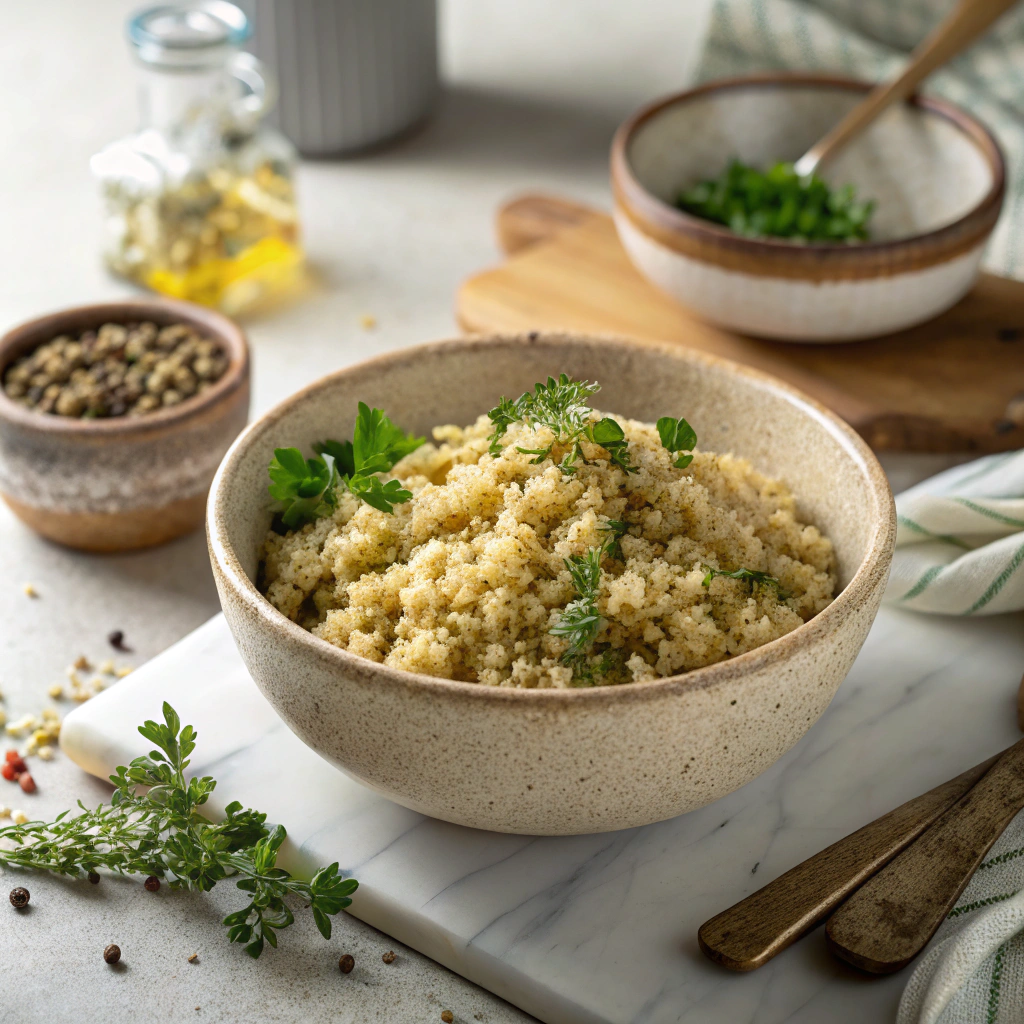
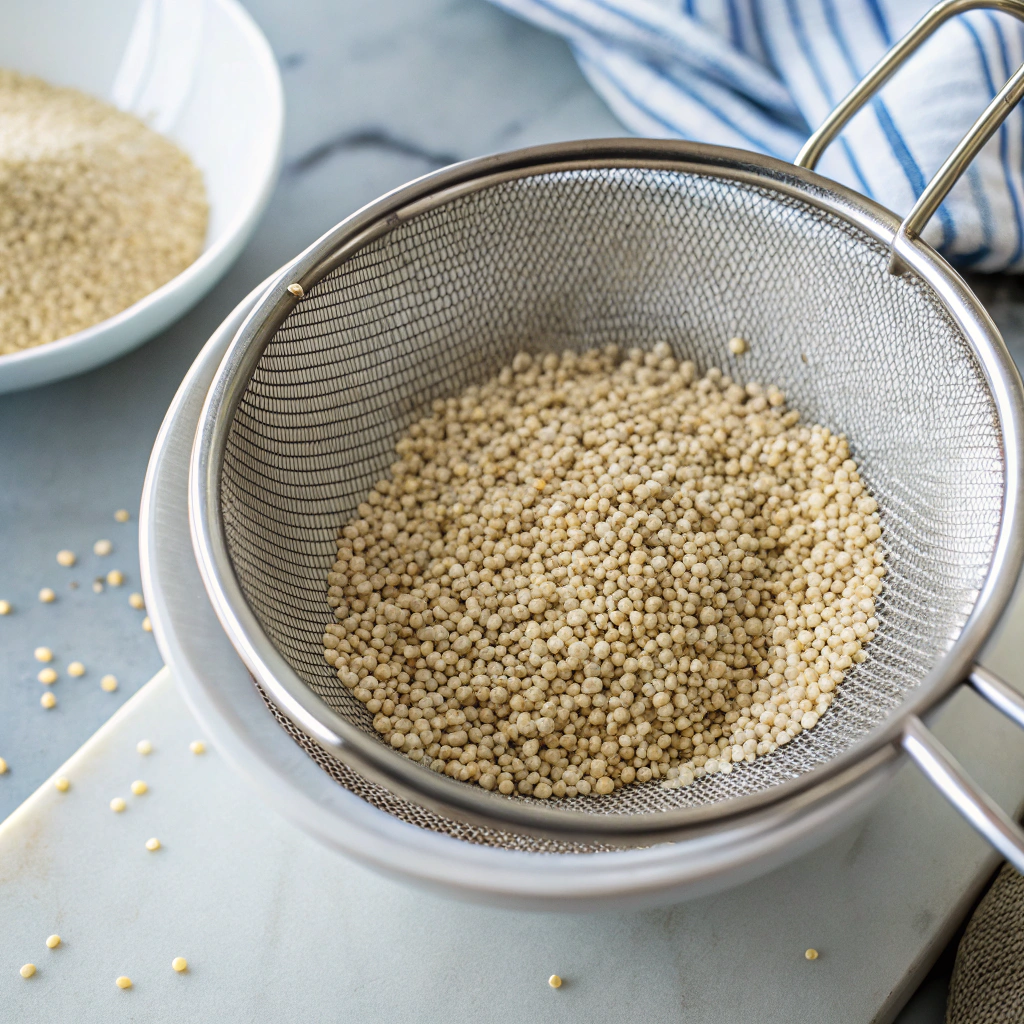
Getting perfectly fluffy quinoa starts with proper preparation. First, measure your quinoa into a fine-mesh strainer – you’ll want 1 cup of quinoa for every 2 cups of liquid.
Now here’s a game-changing tip: rinse that quinoa under cold water for at least 30 seconds, gently rubbing the grains between your fingers. This removes the natural coating called saponin, which can make your quinoa taste bitter. Watch for the water to run clear – that’s your signal it’s ready!
For measuring, use the same cup for both quinoa and liquid to maintain the crucial 1:2 ratio. A kitchen scale works great too, with 1 cup of quinoa weighing about 170 grams. Remember to drain thoroughly after rinsing; excess water can throw off your liquid ratio and affect the final texture.
Perfect Cooking Method
To cook quinoa perfectly, start by bringing your liquid of choice to a gentle boil – whether that’s water, broth, or a flavorful combination. Add your rinsed quinoa and reduce the heat to low-medium, letting it simmer with the lid on.
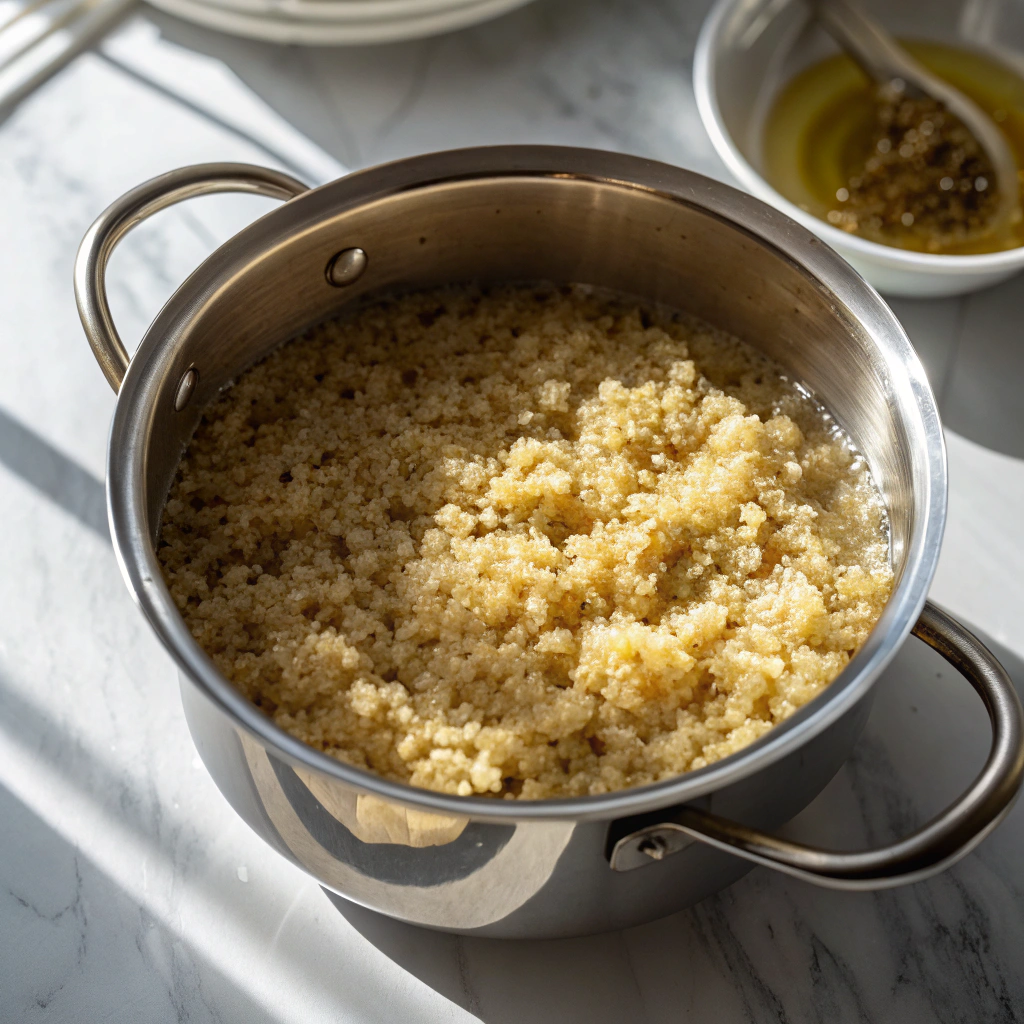
Here’s a pro tip: resist the urge to peek! Let it cook undisturbed for about 15-20 minutes until those tiny spiral-like threads appear, telling you the quinoa is ready. You’ll notice small holes forming on the surface as the quinoa cooks – that’s exactly what you want to see!
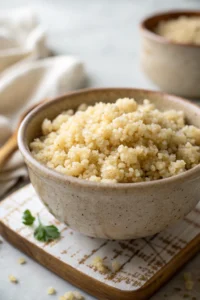
Once all the liquid is absorbed, remove from heat and let it rest, covered, for 5-10 minutes. This crucial resting period allows the quinoa to steam and become perfectly fluffy. Finally, fluff with a fork, and you’ll have tender, perfectly cooked quinoa every time.
Flavor Variations and Mix-Ins
Want to cook quinoa with more excitement? Try infusing your cooking liquid with crushed garlic, fresh herbs, or citrus zest. For a Middle Eastern twist, add a cinnamon stick and bay leaf while cooking.
Once your quinoa is done, you can fold in roasted vegetables, sautéed mushrooms, or crispy chickpeas. Toast pine nuts or pumpkin seeds separately and sprinkle them on top for delightful crunch. For a protein boost, stir in grilled chicken, pan-seared tofu, or flaked salmon.
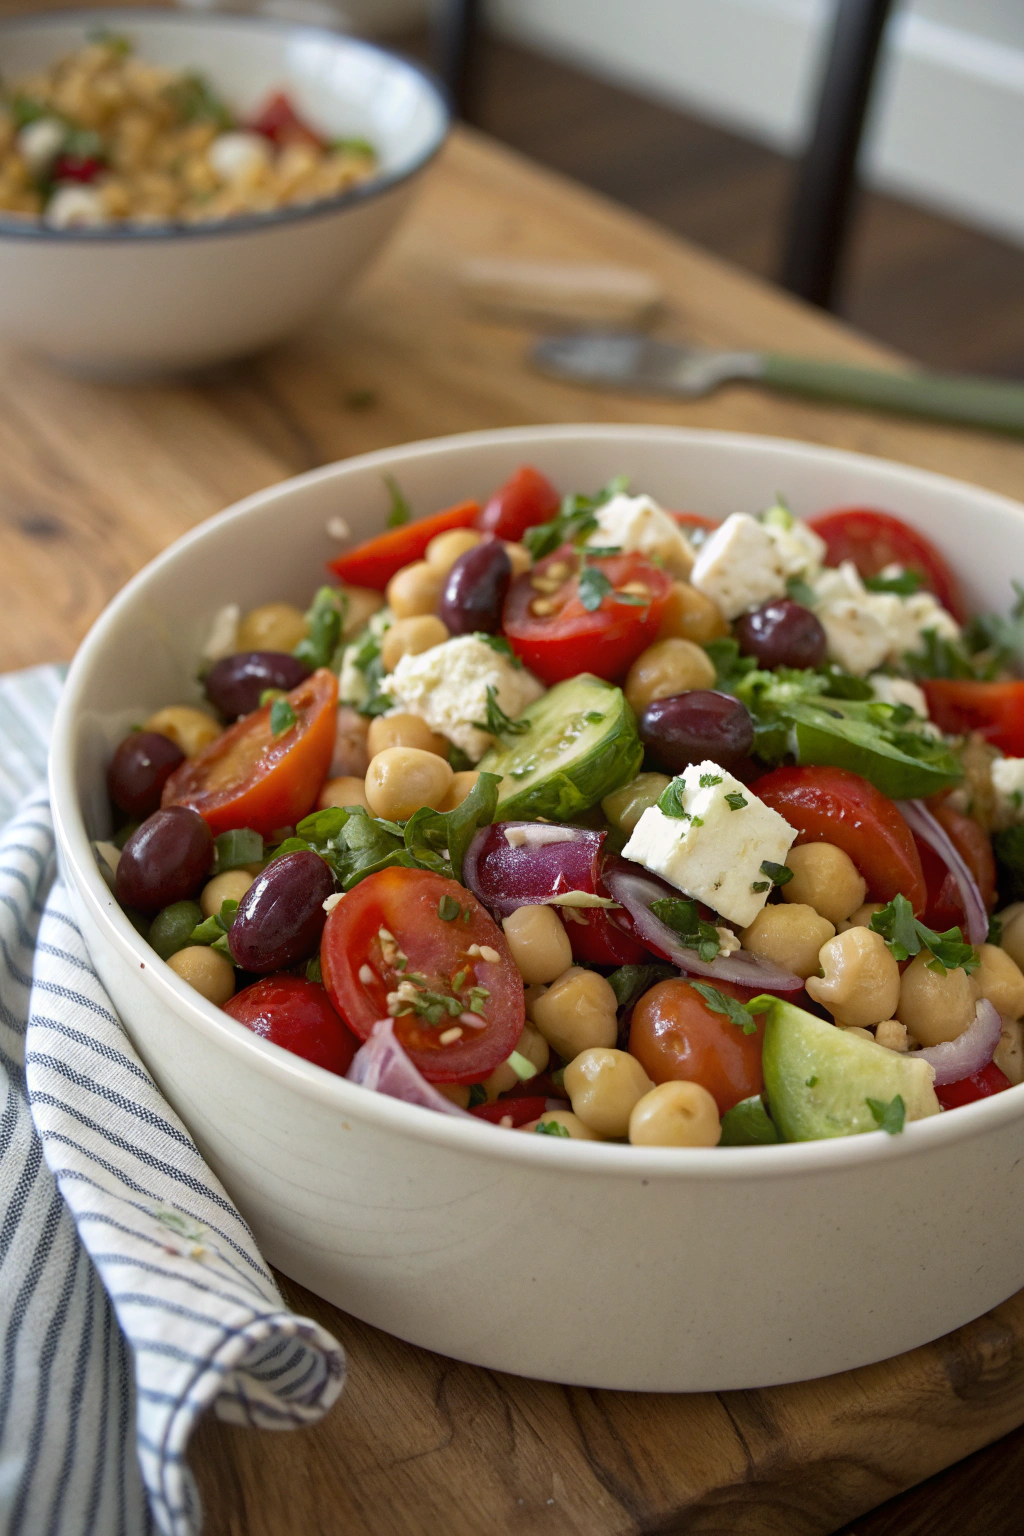
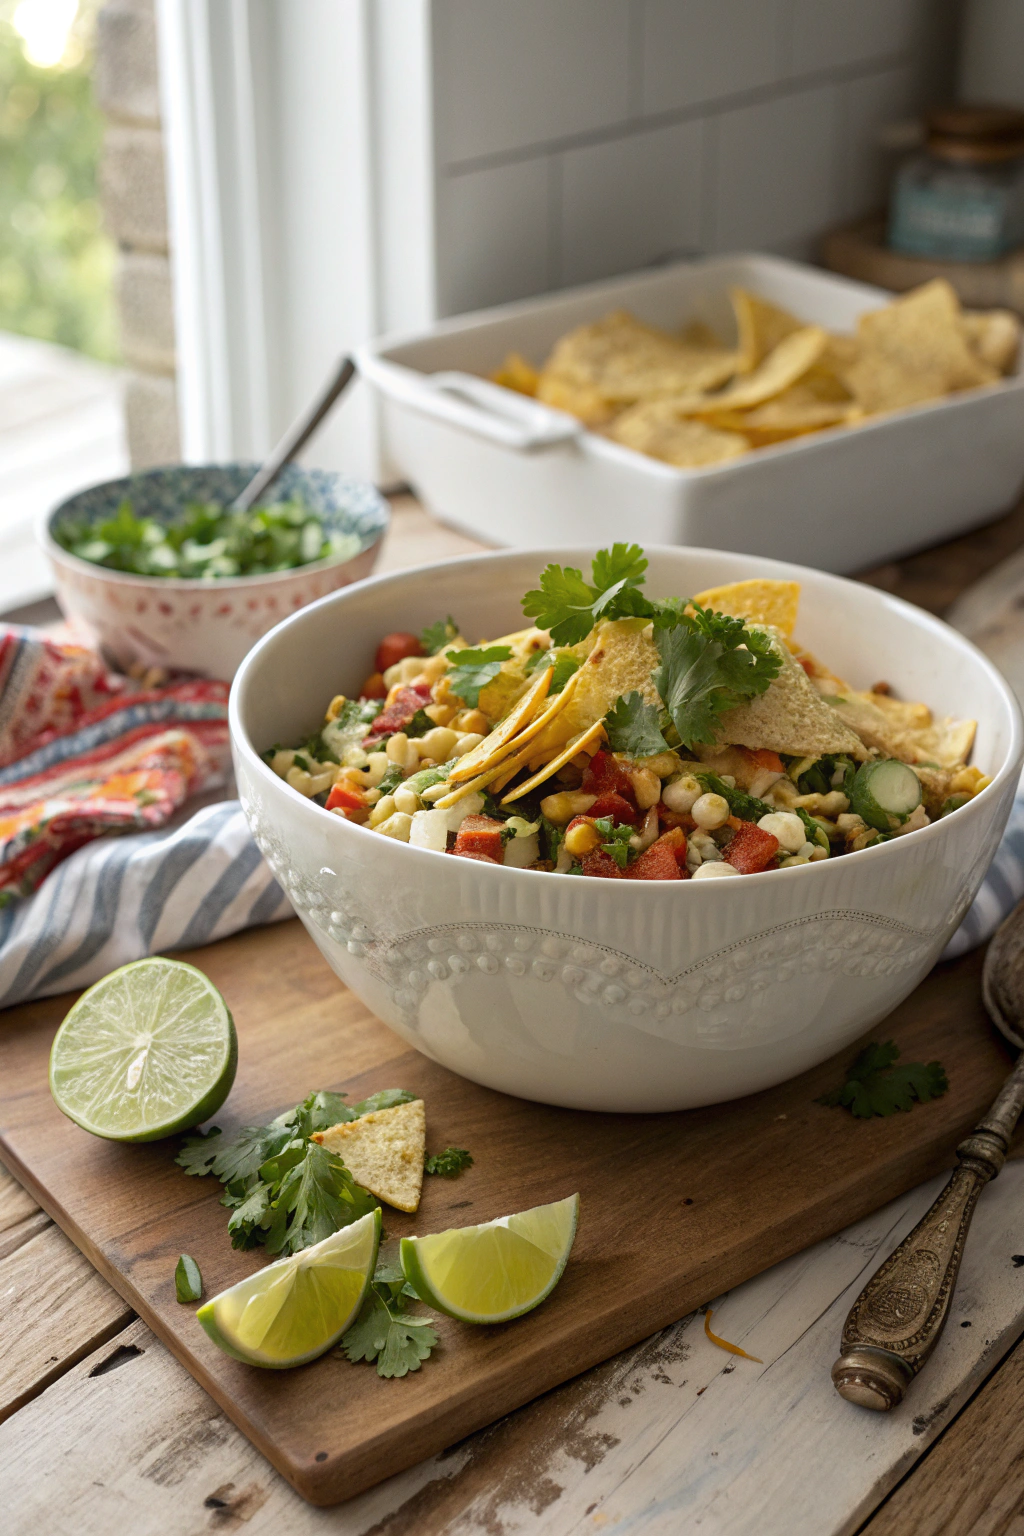
Make it Mediterranean by mixing in cherry tomatoes, cucumber, and crumbled feta. Going Mexican? Add black beans, corn, and fresh lime juice. The possibilities are endless! Just remember to add any fresh herbs or delicate ingredients after cooking to preserve their flavors and textures. These variations transform basic quinoa into exciting meals that’ll keep you coming back for more.
Professional Chef Secrets for Perfect Quinoa
Temperature Control Mastery
Mastering how to cook quinoa starts with perfect temperature control. Begin with a medium-high heat to bring your liquid to a gentle boil – you should see small, consistent bubbles rising to the surface. Once boiling, immediately reduce to low heat, maintaining just a slight simmer. Watch for tiny bubbles occasionally breaking the surface.
This two-stage heating process ensures the quinoa cooks evenly without becoming mushy. The gentle simmer allows the seeds to gradually absorb liquid while developing their signature texture. Keep the lid tightly sealed to trap steam, which helps create that light, fluffy result. If you see too much steam escaping, your heat might be too high.
Remember, patience is key – resist the urge to increase the temperature or lift the lid. For a cozy morning alternative, try our quinoa breakfast bowl that uses these same temperature control principles.
Perfect Liquid Ratios
The secret to perfectly cooked quinoa lies in mastering the liquid-to-grain ratio. Start with 1 cup of quinoa to 2 cups of liquid – water works great, but broth adds amazing depth. Rinse your quinoa thoroughly under cold water first to remove any bitter coating.
For extra flavor, toast the rinsed quinoa in your pot for 1-2 minutes until it smells nutty. Watch for that signature popping sound as the seeds dance in the pan! Once you add your liquid, avoid stirring – this can make your quinoa mushy. Instead, let it do its thing undisturbed.
When it’s done, you’ll notice tiny spiral-like threads separating from the seeds. For a protein-packed morning meal that uses these same ratio principles, try our quinoa breakfast bowl – it’s a game-changer for starting your day right.
Seasoning and Flavor Variations
Want to take your quinoa from good to amazing? Let’s talk flavor! Start by toasting spices like cumin seeds or coriander in the pot before adding your quinoa – the heat releases incredible aromatics. For Mediterranean vibes, toss in dried oregano and a bay leaf while cooking. Going Asian-inspired? Fresh ginger and a splash of sesame oil work wonders.
Don’t forget about herbs! Fresh cilantro, mint, or basil added after cooking brings brightness to every bite. For a protein boost that doesn’t compromise texture, stir in some toasted pine nuts or pumpkin seeds once it’s done. And here’s a pro tip: a squeeze of fresh lemon juice just before serving wakes up all those flavors.
For a complete meal that puts these flavoring techniques to delicious use, try our Mediterranean Chickpea Salad – it’s a perfect showcase for perfectly seasoned quinoa.
Fixing Common Quinoa Cooking Mistakes
Dealing with Bitter Taste
One of the biggest challenges when you cook quinoa is managing its natural bitter taste. This comes from saponins, a protective coating on the seeds. While most packaged quinoa is pre-rinsed, giving it an extra rinse under cold water in a fine-mesh strainer can make a world of difference.
Gently rub the seeds between your fingers as you rinse until the water runs clear – you’ll notice it stops getting foamy. For consistently delicious results, try our Perfect Quinoa Breakfast Bowl recipe that uses this thorough rinsing technique.
If you’re still noticing bitterness after cooking, try toasting your rinsed quinoa in a dry pan for 2-3 minutes before adding liquid. This quick step develops a lovely nutty flavor that naturally masks any remaining bitterness.
Perfect Water-to-Quinoa Ratio
Getting the right liquid ratio is crucial when you cook quinoa for the perfect texture. Start with 1¾ cups of water or broth for every cup of quinoa – this creates fluffy grains that aren’t waterlogged or mushy.
Bring your liquid to a gentle boil first, then add the rinsed quinoa. Here’s a pro tip: resist the urge to stir too often! Once boiling, reduce heat to low, cover tightly, and let it simmer for exactly 15 minutes. You’ll know it’s done when tiny spiral-like threads appear around each grain and the quinoa is tender but still has a slight bite.
Let it rest covered for 5 minutes after cooking – this final step allows any remaining moisture to distribute evenly. For extra flavor without adding calories, try cooking your quinoa in vegetable or chicken broth instead of water.
Toasting Quinoa for Enhanced Flavor
Want to take your quinoa from good to amazing? Start by toasting the dry quinoa in your pot before adding any liquid. This simple step releases the natural oils and creates a wonderful nutty aroma that transforms the final dish.
Just add the rinsed and dried quinoa to a hot, dry pot over medium heat. Keep stirring gently for 4-5 minutes until you hear light popping sounds and smell that toasty fragrance. Watch carefully – you want golden, not burnt! The grains should turn slightly darker and give off a warm, nutty scent.
This extra step adds incredible depth to your quinoa without any additional ingredients. Plus, toasting actually helps the grains cook more evenly once you add the liquid. It’s especially great when preparing quinoa for grain bowls or salads where you want that extra layer of flavor.
Creative Quinoa Preparation Styles
Traditional South American Methods

Discover the authentic way to cook quinoa passed down through generations in the Andes Mountains. Start by rinsing the quinoa thoroughly under cold water, gently rubbing the grains between your palms to remove the bitter saponin coating.
In Peru, cooks traditionally use a 1:2 ratio of quinoa to liquid, often incorporating aromatic herbs like huacatay or muña. The key is bringing the liquid to a gentle simmer before adding the quinoa – never a rolling boil! Let it cook uncovered until you see those distinctive spiral germs separate from the seeds.
For an authentic touch, try our cozy quinoa breakfast bowl which draws inspiration from traditional Andean preparations. The final texture should be light and fluffy, with each grain maintaining its individual shape while still being tender to the bite.
Modern Quinoa Cooking Methods
For perfect quinoa every time, start with the right tools and techniques. A fine-mesh strainer is essential for thorough rinsing – those tiny grains need special attention! Use a heavy-bottomed saucepan with a tight-fitting lid to maintain even heat distribution.
The secret to fluffy texture lies in the perfect liquid ratio: 1 cup quinoa to 1.75 cups liquid for firmer grains, or 2 cups for softer results. Once boiling, reduce heat immediately to maintain a gentle simmer. Set your timer for exactly 15 minutes, then let it rest covered for 5 minutes – no peeking!
The final step? Fluff gently with a fork, working from the bottom up. This method creates that perfect, light texture where each grain stands independently. For extra flavor depth, try toasting your quinoa in a dry pan before cooking until it starts making little popping sounds.
Quinoa Storage and Prep Tips
Getting the most from your quinoa starts before cooking. Store uncooked quinoa in an airtight container in a cool, dark pantry – it’ll keep for up to 2 years! Before cooking, don’t skip the crucial rinsing step. Place quinoa in a fine-mesh strainer and rinse under cold water until it runs clear, about 30 seconds. This removes the natural coating called saponin that can make quinoa taste bitter.
Watch for tiny bubbles forming as you rinse – that’s the saponin washing away! For extra nutty flavor, try dry-toasting your rinsed and dried quinoa in the pan before adding liquid. You’ll know it’s ready when you hear little popping sounds and smell that wonderful toasted aroma. This simple step adds incredible depth to any quinoa dish.
Remember to let the quinoa cool completely before storing cooked leftovers in an airtight container.
Start Cooking Your Perfect Quinoa Today
Ready to master quinoa? With these tips in your cooking arsenal, you’re all set to create perfectly fluffy, delicious quinoa every time. Whether you’re meal prepping for the week or cooking for tonight’s dinner, your quinoa will turn out restaurant-worthy. Get started now – your tastier, healthier meals are just one pot away!