Is your microwave looking like a crime scene after last night’s spaghetti explosion? Don’t worry – I’ve got your back! As someone who practically lives in the kitchen, I know how quickly a clean microwave can turn into a splatter-filled mess. But here’s the good news: you don’t need fancy cleaners or hours of scrubbing to get it sparkling again.
Through years of trial and error (and countless food explosions), I’ve discovered some seriously effective tricks to clean microwave interiors without breaking a sweat. From the classic lemon-steam method to my grandmother’s vinegar solution, these techniques will transform your grimy appliance into a spotless cooking companion in minutes.
Why Regular Microwave Cleaning Matters
Health & Safety Benefits of a Clean Microwave
A clean microwave isn’t just about aesthetics – it’s crucial for your family’s health and safety. When food particles stick around, they become perfect breeding grounds for harmful bacteria. Plus, these crusty bits can actually catch fire during cooking! I learned this the hard way last summer when my son’s forgotten pizza remnants started smoking.
Here’s why maintaining a spotless microwave matters:
• Prevents cross-contamination between different meals
• Stops bacteria growth in food splatter
• Reduces fire hazards from burnt residue
• Helps your appliance work more efficiently
• Extends your microwave’s lifespan
Think about it – those dried-up splatters aren’t just gross, they’re absorbing energy meant for your food. This means longer cooking times and higher electric bills. My aunt Nancy swears her 15-year-old microwave still works perfectly because she wipes it down after every use. Remember, a clean cooking space equals safe, efficient heating every time!
Impact on Food Taste & Cooking Quality
Did you know a dirty microwave can actually change how your food tastes? When you clean microwave surfaces regularly, you’re not just tidying up – you’re protecting your meals’ flavors. Those lingering odors from last night’s fish or morning’s burnt popcorn can seep into today’s dishes, creating unwanted taste combinations. I noticed this myself when my reheated coffee started tasting like leftover curry!
The problem goes deeper than just mixed flavors. Crusty residue can create hot spots that cook your food unevenly. Think about biting into a frozen middle while the edges are scorching hot – that’s what happens when grime interferes with microwave circulation. My daughter’s mac and cheese always turns out perfectly now that we keep our microwave spotless. Plus, a clean cooking chamber helps maintain proper moisture levels, preventing your leftovers from drying out. Remember, those mystery spots aren’t just eyesores – they’re flavor thieves!
Energy Efficiency & Appliance Lifespan
Did you know that when you clean microwave interiors regularly, you’re actually saving money on your energy bills? A spotless microwave works up to 25% more efficiently because food particles and grease don’t block the waves that heat your food. I learned this the hard way after my electricity bill shot up last winter! Think of it like trying to shine a flashlight through a dirty window – the light just can’t get through as well.
Regular cleaning also prevents wear and tear on vital components. Those crusty spots can actually burn and damage the interior coating over time. Just last month, my neighbor had to replace her microwave because accumulated grime had eaten through the cavity walls.
By keeping your appliance clean, you’ll not only cut down on energy waste but also double its working life. Now that’s what I call a smart kitchen investment!
5-Step Microwave Cleaning Process
Gathering Natural Cleaning Supplies
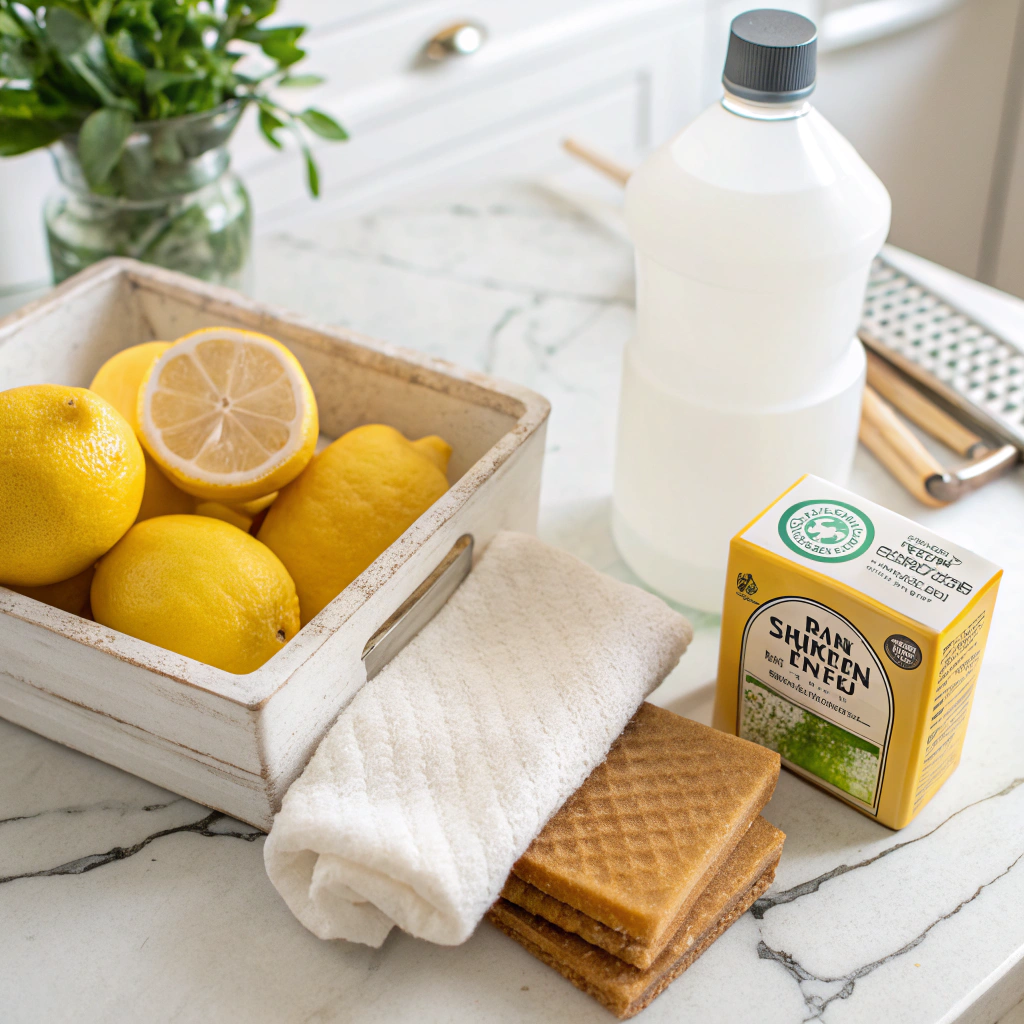
Before diving into the cleaning process, let’s round up some natural cleaning powerhouses from your kitchen. You’ll need white vinegar (my go-to degreaser!), fresh lemons, baking soda, and a clean microfiber cloth. I discovered this combo works better than harsh chemicals after years of testing different methods.
The acid in lemons and vinegar breaks down stubborn food particles, while baking soda tackles those lingering odors that make reheating coffee a weird experience. Plus, these natural cleaners won’t leave behind any harmful residues that could transfer to your food.
I keep these supplies in a dedicated cleaning caddy under my sink for quick access. Trust me, once you try this natural cleaning arsenal, you’ll never go back to those expensive store-bought cleaners. The best part? These ingredients cost a fraction of commercial products and are completely food-safe!
Steam-Based Deep Cleaning Method
Ready to tackle those stubborn microwave messes? Let’s start with my favorite deep-cleaning hack using steam power. Fill a microwave-safe bowl with water and add a few lemon slices or a splash of white vinegar. Heat this mixture for 5 minutes until it creates a steamy environment inside.
The steam will soften all those dried-on food splatters, making them super easy to wipe away. I discovered this trick when dealing with exploded spaghetti sauce – total game-changer! Just let the steam work its magic for another 5 minutes before opening the door.
Then, use your damp microfiber cloth to wipe everything clean, starting from the top and working your way down. Those tough spots that usually need serious elbow grease? They’ll slide right off! The bonus? Your microwave will smell amazingly fresh, not like harsh chemicals.
Quick Vinegar and Salt Method
Want to clean your microwave without harsh chemicals? Here’s a super effective method using pantry staples. Fill a microwave-safe bowl with equal parts water and white vinegar, then add a tablespoon of salt. The salt helps break down stubborn grease while vinegar tackles odors.
Heat this mixture for 3 minutes until it’s steaming hot. Let it sit for 2 minutes with the door closed – this allows the steam to really penetrate those tough spots. Wipe everything down with a clean cloth, starting from the ceiling and working your way to the turntable.
For extra cleaning power, dip your cloth in the warm vinegar solution. Those greasy splatters will wipe right off! As a bonus, this method naturally deodorizes your microwave, leaving it fresh and spotless. Remember to remove and wash the turntable separately for a thorough clean.
Professional Microwave Cleaning Secrets
Perfect Timing for Maximum Steam Effect
Want to know the secret to effortlessly clean your microwave? It’s all about perfect timing and steam power. Fill a microwave-safe bowl with 2 cups of water and heat it for exactly 5 minutes – this creates the optimal amount of steam to loosen stubborn food particles.
The key is letting the steam work its magic for another 3 minutes after heating, keeping the door closed tight. This waiting period allows the hot steam to penetrate dried-on splatters and grease effectively.
For extra cleaning power, add 2 tablespoons of lemon juice to your water before heating. The citrus acids help break down tough stains while leaving a fresh scent. This technique is particularly effective for those really tough spots near the top of your microwave where food tends to explode and stick. Remember to use oven mitts when removing the hot bowl!
Natural Cleaning Solutions for Tough Microwave Messes
When dealing with stubborn microwave stains, natural cleaning solutions work wonders. Vinegar is your secret weapon – fill a microwave-safe bowl with 1 cup of white vinegar and 1 cup of water. The acidity breaks down even the most stubborn food residue while eliminating odors naturally.
For extra cleaning power, add 3-4 drops of your favorite essential oil like lavender or tea tree. This combination not only cleans effectively but also leaves your microwave smelling fresh. The vinegar solution is especially powerful for those brown, caramelized spots that regular cleaning methods can’t tackle.
Plus, it’s completely safe for food preparation surfaces, unlike harsh chemical cleaners. Remember to wipe down the turntable plate separately – it often harbors hidden food particles and grease that need extra attention.
Steam Cleaning Method for Spotless Results
Steam is your microwave’s best friend when it comes to effortless cleaning. Simply fill a microwave-safe bowl with plain water and microwave it for 3-4 minutes until it creates a thick steam. This steam naturally softens dried-on food and stubborn spots, making them wipe away easily.
For extra cleaning power, add a few lemon slices to the water – the citrus oils help dissolve grease while leaving a fresh scent. Let the steamy bowl sit for 2 minutes after microwaving to allow the condensation to work its magic.
Then, using a clean cloth, wipe down all surfaces starting from the top. The steam method is particularly effective for those crusty spots around the turntable edges and ceiling of your microwave. Remember to remove and separately clean any removable parts like the turntable for thorough results.
Common Microwave Cleaning Challenges
Stubborn Grease & Burnt Food Removal
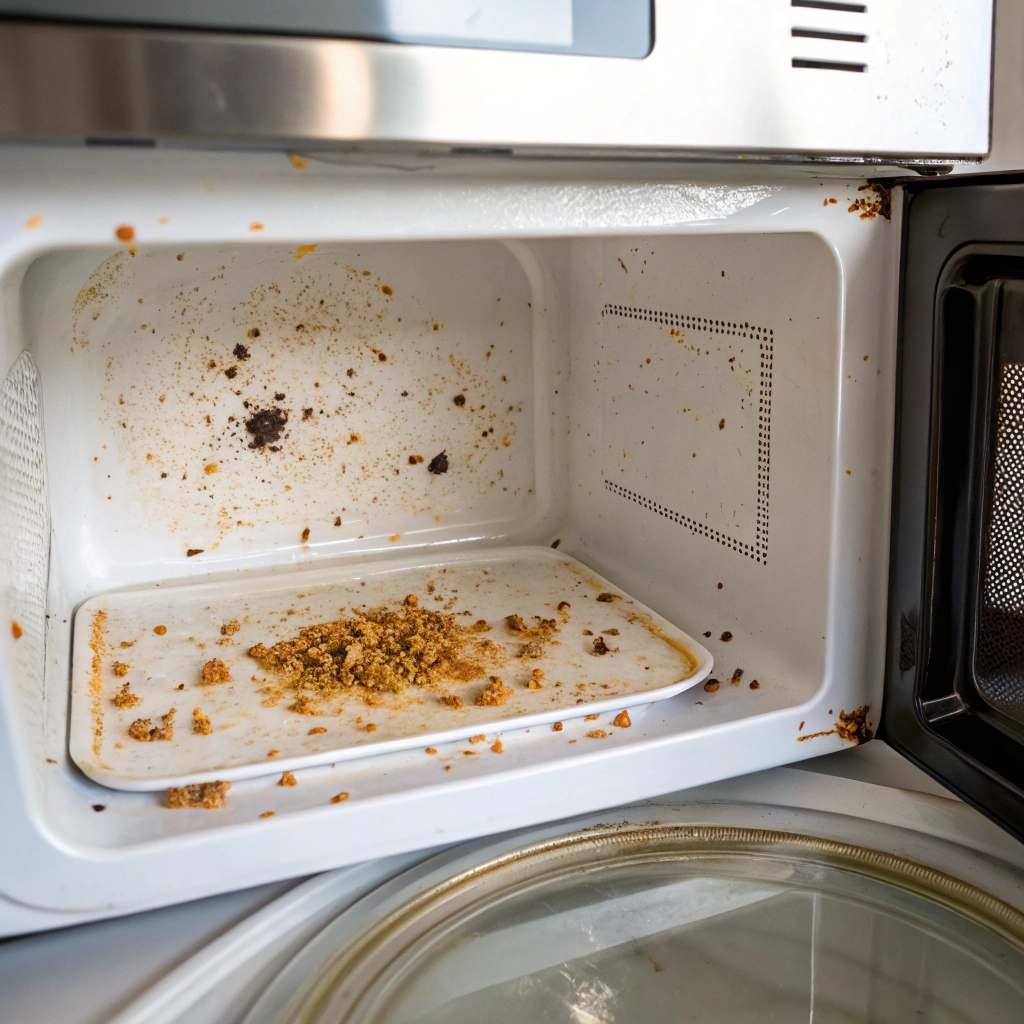
Getting rid of baked-on food and greasy splatters can feel like an uphill battle. Those dark, crusty spots seem to mock your cleaning efforts, especially around the ceiling and walls. The key is using the right combination of cleaning agents and timing. Mix equal parts white vinegar and water in a microwave-safe bowl, then heat for 2 minutes until steaming.
The acidic vapors help break down stubborn residue naturally. For extra-tough spots, make a paste with baking soda and water, apply it directly to the stains, and let it sit for 5 minutes before wiping.
Never use abrasive scrubbers that could scratch the interior. Instead, opt for a soft sponge or microfiber cloth. Regular cleaning after each use prevents buildup and makes deep cleaning sessions much easier.
Odor Elimination & Sanitization
Keep your microwave fresh and germ-free with proven sanitization methods. A simple lemon trick works wonders – just slice a lemon, place it in a bowl of water, and microwave for 3 minutes. The citrus steam naturally deodorizes while killing bacteria.
For stubborn smells, try placing a bowl of coffee grounds overnight to absorb lingering odors. White vinegar also doubles as a natural sanitizer – mix equal parts vinegar and water in a bowl, heat until steamy, then wipe down surfaces with the solution.
Remember to clean spills immediately to prevent odor-causing bacteria growth. Leave the door open for 10 minutes after cleaning to air out completely. Regular maintenance with these natural methods keeps your microwave smelling fresh while ensuring it’s properly sanitized for safe food preparation. The bonus? These solutions are completely non-toxic and food-safe.
Quick Cleaning Methods
Keep your microwave spotless in minutes with these proven speed-cleaning tricks. Place a damp paper towel inside and run for 30 seconds – the steam loosens tough grime for easy wiping. For stuck-on food, microwave a bowl of water with dish soap for 2 minutes. The soapy steam helps dissolve stubborn spots without scrubbing.
A quick vinegar wipe-down after cooking prevents splatter buildup. Pro tip: cover dishes with paper towels while cooking to minimize mess. For daily maintenance, wipe the turntable and interior walls with a damp cloth after each use. This simple habit prevents food from hardening and makes deep cleaning easier.
Remember to clean the exterior buttons and handle regularly too – they’re often overlooked but can harbor bacteria. These quick methods keep your microwave clean with minimal effort, ensuring safe and hygienic cooking every time.
Creative Microwave Cleaning Methods
Vinegar & Water Solution Technique
Transform your dirty microwave into a sparkling clean appliance with this powerful natural solution. Mix equal parts white vinegar and water in a microwave-safe bowl – about one cup each works perfectly. The vinegar’s natural acids break down stubborn food residue while eliminating odors.
Place the bowl inside and run on high for 5 minutes until the mixture boils vigorously. Let it sit for 2-3 minutes as the steam continues working its magic. The acidic steam penetrates dried-on splatters, making them effortless to remove. When you open the door, be careful of the hot steam.
Simply wipe down the interior with a clean cloth – those tough stains will glide right off! The vinegar solution also naturally deodorizes, leaving your microwave fresh and sanitized. For extra cleaning power, add a few lemon slices to the mixture.
The Lemon Method: Natural Microwave Deodorizing
For a chemical-free way to clean microwave surfaces, the lemon technique works wonders. Cut a fresh lemon in half and place both pieces in a microwave-safe bowl filled with water. Heat on high for 3 minutes until the water boils vigorously. The citrus oils released create a powerful natural cleaning agent that cuts through grease while eliminating unpleasant odors.
Let the steamy mixture sit for 5 minutes with the door closed – this allows the acidic steam to fully penetrate stuck-on food particles. The citrus steam not only loosens debris but also naturally disinfects surfaces.
Once done, carefully remove the hot bowl and wipe down all surfaces with a clean cloth. Your microwave will sparkle with a fresh lemony scent! For extra cleaning power, sprinkle some baking soda on stubborn spots before wiping.
The Vinegar Method: Powerful Deep Cleaning
Tackle tough microwave messes with the power of white vinegar. Fill a microwave-safe bowl with equal parts water and vinegar, then heat on high for 5 minutes. The acidic steam penetrates baked-on food and grease while eliminating stubborn odors.
Let the mixture sit for 3 minutes with the door closed to maximize cleaning effectiveness. The hot vinegar solution softens even the most hardened spills, making them easy to wipe away. For extra cleaning muscle, dip your cloth directly in the warm vinegar mixture before wiping.
Focus on problem areas like the ceiling and corners where splatter tends to accumulate. A final wipe with a clean damp cloth removes any lingering vinegar smell. This method is especially effective for removing burnt popcorn odors and yellow grease stains.
Start Your Microwave Cleaning Today
Don’t wait for spills to become stubborn stains. Grab your cleaning supplies and transform your microwave in just 10 minutes. Your family deserves a sparkling clean appliance for safe, efficient cooking. Remember, regular maintenance prevents tough buildup and extends your microwave’s life. Ready to get started? Follow our proven methods for a pristine microwave today!