
Oh my goodness, you guys – let me tell you about my sugar free chocolate journey! After my doctor told me to cut back on sugar last year, I thought my chocolate-loving days were over. But here’s the thing: making sugar free chocolate at home isn’t just possible, it’s actually amazing! Through countless (and sometimes messy!) kitchen experiments, I’ve figured out how to create creamy, decadent sugar free chocolate that totally satisfies those sweet cravings. My kids can’t even tell the difference! Whether you’re watching your sugar intake or just curious about healthier alternatives, I’m super excited to share everything I’ve learned about crafting the perfect batch of sugar free chocolate right in your own kitchen.
The Science Behind Sugar Free Chocolate Making
Best Natural Sweeteners for Chocolate
Let’s talk sweeteners, friends! When I first started making sugar free chocolate, I was totally overwhelmed by all the options. Through lots of trial and error (and some seriously weird-tasting batches!), I’ve found that monk fruit extract and stevia are absolute game-changers. When making sugar free chocolate at home, learning how to melt chocolate properly is essential for success. The trick with sugar free chocolate is finding that perfect balance – too much sweetener and it’ll taste artificial, too little and it’s bitter city! I’ve had the best results using a combination approach: a touch of monk fruit for overall sweetness, plus a tiny bit of stevia to round things out. Just remember that these sweeteners are way more potent than regular sugar, so start with just a pinch and adjust to taste.
How Cocoa Butter Affects Texture
Y’all, cocoa butter is seriously the MVP when making sugar free chocolate at home! I learned this the hard way after my first batch turned out grainy and weird. The secret to that smooth, melt-in-your-mouth texture we all love? It’s all about the cocoa butter ratio. Too little, and your sugar free chocolate will be crumbly; too much, and it’ll never set properly. I’ve found that using about 40% cocoa butter gives that perfect snap when you break it. Pro tip: always use food-grade cocoa butter – that fancy stuff meant for skincare won’t cut it! And make sure to melt it slowly – I once rushed this step and ended up with a grainy mess.
Temperature Control Tips for Perfect Results
Okay, here’s where things get a bit technical – but don’t worry, I’ve got your back! Temperature is absolutely crucial when making sugar free chocolate at home. Trust me, I’ve had my share of bloomed, streaky batches before figuring this out! You’ll want to heat your cocoa butter to exactly 115°F, then let it cool to 81°F before reheating to 88°F for that perfect shine. Sounds fussy? Maybe, but it’s totally worth it! I use a cheap candy thermometer from the grocery store – nothing fancy needed. The biggest game-changer was when I started using a double boiler instead of the microwave. Way more control!
Essential Ingredients for Sugar Free Chocolate
Choosing the Right Cocoa Powder
When making sugar free chocolate at home, starting with high-quality cocoa powder is crucial. I’ve learned through countless batches that Dutch-processed cocoa works best for a smooth, rich flavor without any bitter aftertaste. The alkalized process helps create that classic chocolate taste we all love. Look for brands that contain at least 22-24% cocoa butter content – this ensures your sugar free chocolate will have the right texture and mouthfeel.
I always sift my cocoa powder before using it to prevent any lumps in the final product. For darker varieties, raw cacao powder can be substituted, though you may need to adjust other ingredients slightly to balance the more intense flavor profile. Store your cocoa powder in an airtight container away from heat and moisture to maintain freshness.
Top Sugar Substitutes Compared
Finding the perfect sweetener for sugar free chocolate can be tricky. Through testing various options, I’ve found that erythritol and monk fruit blend beautifully without leaving an artificial taste. When crafting homemade sugar free chocolate, powdered forms work much better than granulated sweeteners. Stevia can work well too, but start with small amounts as it’s incredibly potent. My favorite combination uses a mix of erythritol and monk fruit – this creates a perfectly balanced sweetness that mimics regular chocolate. Allulose is another excellent choice, especially for creating milk chocolate varieties, as it melts similarly to regular sugar. Remember that different sweeteners can affect the texture and crystallization of your chocolate differently.
Must-Have Equipment for Home Production
Creating delicious sugar free chocolate at home doesn’t require fancy equipment, but a few key tools make the process much easier. A good digital thermometer is essential for tempering your chocolate properly – this ensures that glossy finish we all love. I always use silicone molds because they make removing the finished sugar free chocolate incredibly easy. A double boiler setup is crucial; I simply use a heat-safe bowl over a pot of simmering water. Don’t forget about proper storage containers – airtight ones prevent your chocolate from absorbing other flavors. A fine-mesh strainer helps remove any lumps from dry ingredients, while a rubber spatula ensures you don’t waste any precious mixture. Keep these tools clean and dry for the best results
Easy Sugar Free Chocolate Recipes
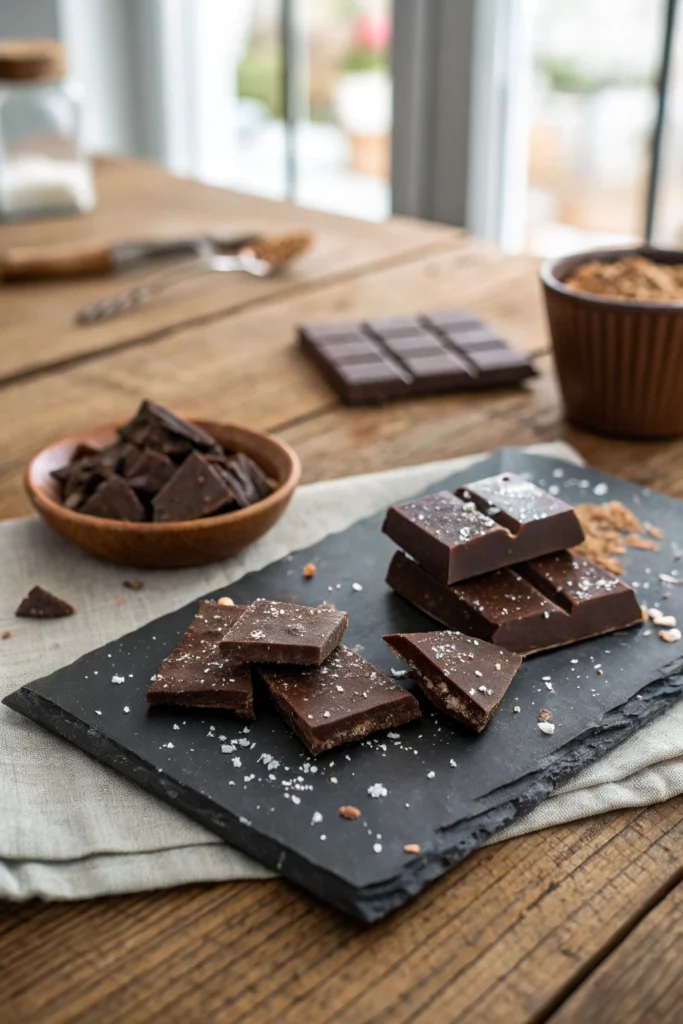
5-Minute Dark Chocolate Bark
Making sugar free chocolate bark is my go-to quick recipe when chocolate cravings hit. Start with 1 cup of cocoa butter, melted carefully in your double boiler. Add ½ cup of sifted cocoa powder and your chosen sweetener – I use 3 tablespoons of powdered erythritol. Stir until completely smooth, then add a pinch of salt and vanilla extract. Pour onto a parchment-lined baking sheet and sprinkle with your favorite toppings. I love using crushed nuts, unsweetened coconut, or sugar-free dried berries. The bark sets up quickly in the fridge, usually within 15 minutes. Break into pieces and store in an airtight container. This recipe is super versatile and perfect for customizing with different flavors.
Creamy Sugar Free Milk Chocolate Bars
Creating creamy sugar free chocolate bars at home is easier than you might think. Combine 1 cup melted cocoa butter with ¼ cup powdered heavy cream (or coconut cream for dairy-free). Mix in ⅓ cup cocoa powder and 4 tablespoons of powdered allulose. The secret to silky smooth texture is adding a tablespoon of sunflower lecithin – it helps everything blend perfectly. Pour the mixture into bar molds and tap gently to remove air bubbles. I like adding a tiny pinch of salt to enhance the flavor. Let them set in the refrigerator for about an hour. These bars have that classic milk chocolate taste we all remember from childhood. If you enjoy making sugar free treats, you might also love trying sugar free candy recipes for more variety.
Keto-Friendly Chocolate Truffles
These sugar free chocolate truffles are pure decadence without the guilt. Start by making a simple ganache: heat ½ cup heavy cream until just simmering, then pour over 1 cup chopped sugar free chocolate. Let it sit for 2 minutes before stirring until smooth. Add a splash of vanilla and a pinch of salt. Chill the mixture for 2 hours until firm. Roll into small balls, then coat with cocoa powder, crushed nuts, or unsweetened coconut. My family can’t tell these aren’t traditional truffles! Store them in the fridge for up to two weeks, though they rarely last that long in my house. They’re perfect for special occasions or thoughtful homemade gifts.
Common Sugar Free Chocolate Mistakes
Preventing Grainy Texture Issues
Making sugar free chocolate at home can be tricky, but getting that smooth texture is totally possible! The key is properly tempering your chocolate and choosing the right sweeteners. I’ve found that powdered erythritol works better than granulated versions when making sugar free chocolate treats. The finer texture helps prevent that dreaded sandy feeling.
Temperature control is crucial too. When melting your chocolate base, use a double boiler and keep the heat gentle. I learned this the hard way after scorching several batches! Another game-changer is adding a tiny bit of cocoa butter, which helps create that silky mouthfeel we all love. If you’re new to making sugar free chocolate, start with smaller batches until you get the hang of the process.
Fixing Separation Problems
One of the biggest challenges when working with sugar free chocolate is preventing the ingredients from separating. This often happens when moisture sneaks in or the temperature fluctuates too much. I always make sure my bowls and utensils are completely dry before starting. Even a few drops of water can make your chocolate seize up!
If your sugar free chocolate does separate, don’t panic. Try adding a small amount of melted cocoa butter while gently stirring. Keep the temperature steady around 88°F (31°C). Sometimes separation occurs because the sweetener wasn’t fully incorporated. Using an immersion blender can help create a more stable emulsion. Just be careful not to introduce air bubbles!
Storage Solutions for Homemade Chocolate
Storing your homemade sugar free chocolate properly is essential for maintaining its quality. I keep mine in an airtight container in a cool, dark place – usually the back of my pantry. Avoid the refrigerator unless you live in a very warm climate, as temperature changes can cause condensation and bloom.
If you make larger batches of sugar free chocolate, consider portioning it before storing. This way, you only need to take out what you’ll use. Line your storage containers with parchment paper to prevent sticking. For best results, consume within two weeks, though properly stored chocolate can last up to a month. Just remember to check for any signs of bloom or off-flavors before eating.
Health Benefits of Sugar Free Chocolate
Diabetes-Friendly Chocolate Options
When choosing sugar free chocolate for diabetes management, look for options sweetened with natural alternatives like stevia or monk fruit. These sweeteners don’t spike blood sugar levels like regular chocolate does. I’ve found that dark sugar free chocolate varieties tend to have the best flavor profile while keeping carbs in check.
Many of my diabetic friends swear by sugar free chocolate as their go-to treat. The key is moderation and reading labels carefully. Some brands add maltitol, which can still affect blood sugar levels slightly. I recommend starting with small portions to see how your body responds. Quality sugar free chocolate can be a wonderful addition to a diabetes-friendly diet.
Comparing Store-Bought vs Homemade Versions
The difference between store-bought and homemade sugar free chocolate is pretty significant. When making it yourself, you have complete control over ingredients. Most commercial sugar free chocolate contains preservatives and stabilizers that you might want to avoid. Plus, homemade versions let you adjust the sweetness to your taste.
I’ve experimented with both, and while store-bought options are convenient, nothing beats the satisfaction of creating your own sugar free chocolate treats. The cost comparison is interesting too – while initial ingredients might seem pricey, making larger batches at home often works out cheaper in the long run. Just remember that homemade versions might need more attention to storage and handling.
Reading Sugar Free Chocolate Labels
Understanding sugar free chocolate labels can feel like solving a puzzle! Look beyond the “sugar-free” claim and check what sweeteners are actually used. Some common ones include erythritol, stevia, and monk fruit. Watch out for hidden carbs – while a product might be sugar free, it could still contain other ingredients that affect blood sugar.
The ingredient list should be your best friend when choosing sugar free chocolate. Quality options typically have cocoa as the first ingredient, followed by sugar alternatives. Be aware of serving sizes too – they’re often smaller than you’d expect. I always check the net carbs and sugar alcohol content, especially if I’m watching my daily intake. Good sugar free chocolate shouldn’t have a long list of artificial ingredients.
Start Your Sugar Free Chocolate Journey Today
Ready to make your own sugar free chocolate? Here’s your quick start guide! Grab unsweetened cocoa powder, cocoa butter, and your preferred sugar substitute. Start with small batches to perfect your technique. Remember, patience is key – rushing the melting process never ends well. Join our Facebook group “World Recipes” to share your creations and get tips from fellow chocolate makers. Let’s make something delicious together!
Sugar Free Chocolate
Perfectly smooth and indulgent chocolate bars made with natural sugar alternatives. These bars snap like traditional chocolate but keep your blood sugar stable. Perfect for diabetics, keto dieters, or anyone watching their sugar intake.
Ingredients
Instructions
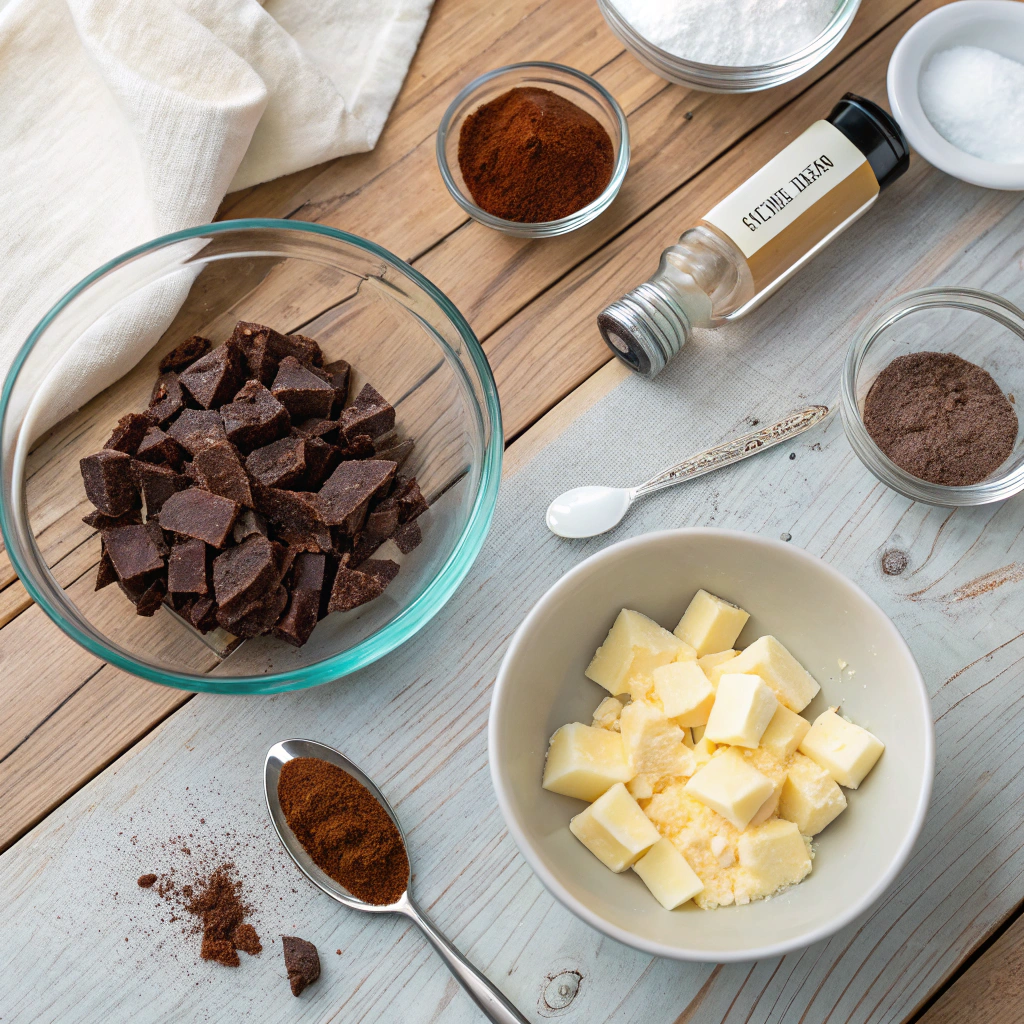
Prepare Your Workspace
- Line a 8x4 inch loaf pan with parchment paper
- Gather all ingredients and a candy thermometerKeep all equipment completely dry
Melt the Cocoa Butter
Using a double boiler, heat cocoa butter to 115°F
- Stir gently until completely meltedWatch temperature carefully - don't exceed 120°F
Add Dry Ingredients
- Sift cocoa powder and sweeteners together
- Whisk into melted cocoa butter until smooth
- Add lecithin, vanilla, and saltMixture should be glossy and lump-free
Temperature Control
- Cool mixture to 81°F
- Reheat gently to 88°FThis creates proper chocolate crystal structure
Pour and Set
- Pour into prepared pan
- Tap gently to remove air bubbles
- Add optional toppings if desiredSurface should be smooth and even
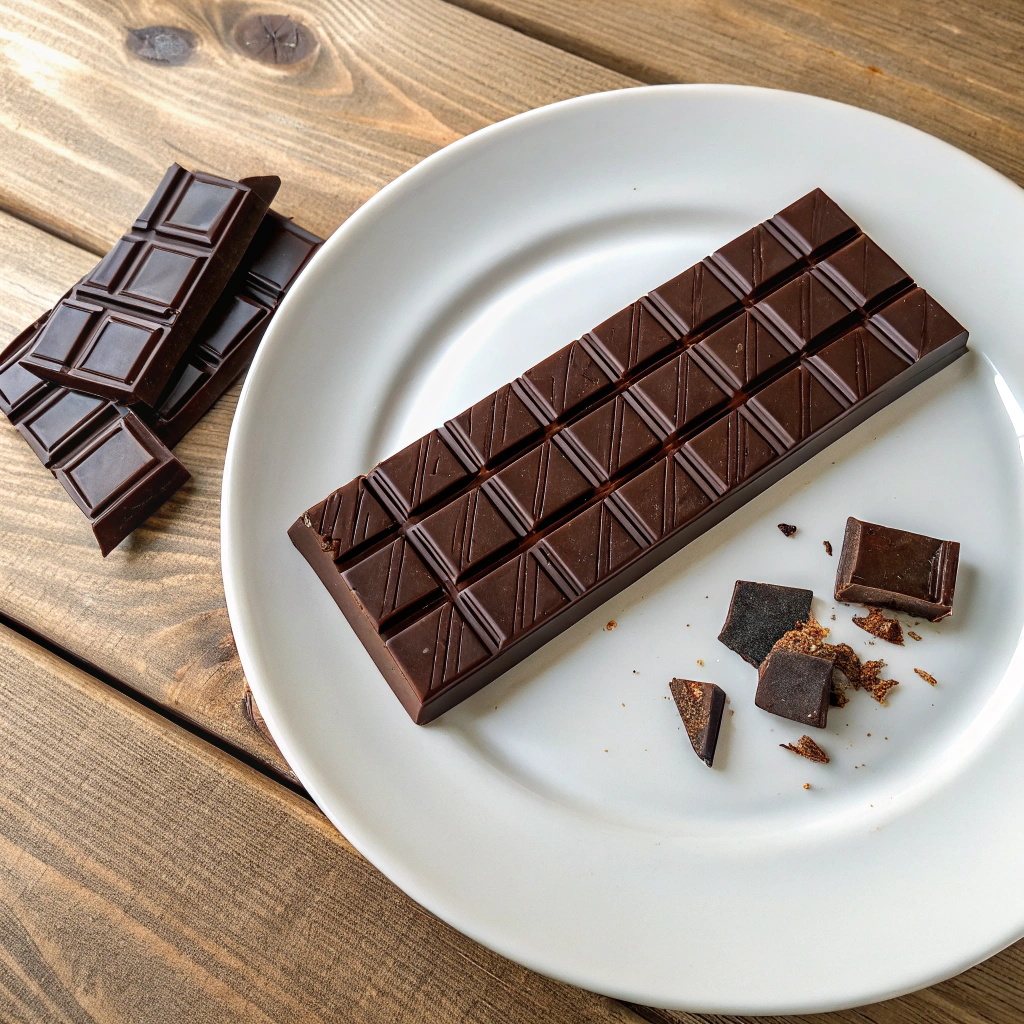
Cool and Store
- Let set at room temperature for 1 hour
- Cut into 12 equal pieces
- Store in airtight containerChocolate should have a clean snap when broken
Nutritional values
Servings: 12 ServingCalories:120kcalTotal Fat:11gSodium:50mgTotal Carbohydrate:3gDietary Fiber: 2gSugars: 0gProtein:2g
Note
Storage Tips:
Keep at room temperature for up to 2 weeks
Avoid refrigeration unless room temperature exceeds 75°F
Store between layers of parchment paper
Substitutions:
Replace erythritol with allulose for softer texture
Use coconut cream powder for milk chocolate version
Swap sunflower lecithin with powdered inulin
Serving Suggestions:
Enjoy plain as a sweet treat
Chop and use in sugar-free baking
Melt for sugar-free chocolate coating