Ever wondered why aluminum foil is a kitchen superstar? This versatile kitchen essential has revolutionized how we cook, store, and serve food. From wrapping leftovers to creating perfect steam packets, aluminum foil is your trusty sidekick for countless cooking adventures. I’ve spent years perfecting foil techniques in my own kitchen, and I’m excited to share these game-changing tips with you.
Think beyond the basic wrap! You’ll discover clever foil hacks that professional chefs swear by. Whether you’re grilling summer vegetables, protecting your oven from spills, or crafting the perfect baked potato, mastering aluminum foil techniques will transform your cooking experience. Ready to unlock the full potential of this kitchen must-have?
What Makes Aluminum Foil Essential in Cooking ?
Chemical Properties and Food Safety Standards
Aluminum foil stands out in kitchen safety thanks to its remarkable heat conductivity and food-grade composition. The FDA has certified aluminum foil as safe for food contact, with its non-toxic nature making it perfect for both hot and cold storage. What’s fascinating is how the foil’s microscopic structure creates a protective barrier that blocks light, moisture, and bacteria from reaching your food. I’ve noticed this especially when wrapping cheese – it stays fresh nearly twice as long compared to plastic wrap!
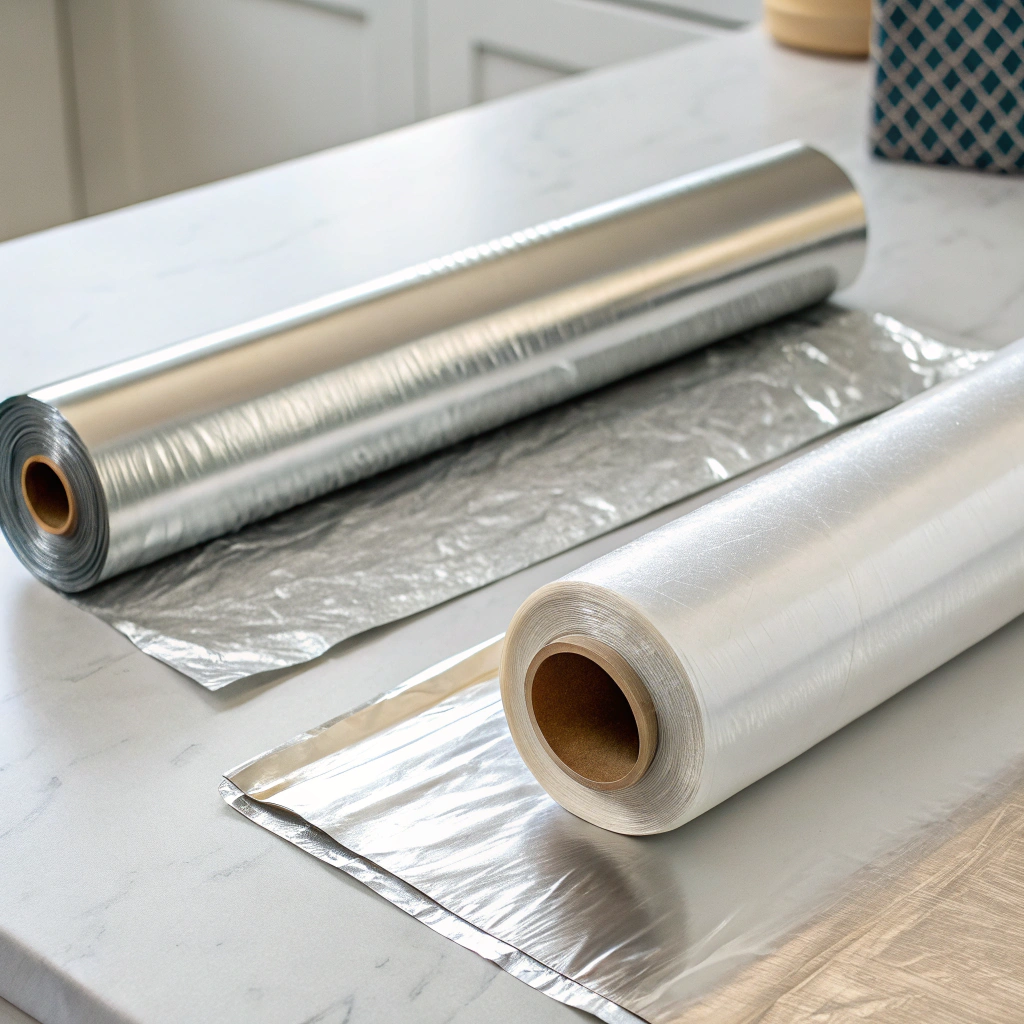
The thickness of household aluminum foil typically ranges from 0.016mm to 0.024mm, giving you that perfect balance between durability and flexibility. The dull side actually has a slightly rougher surface texture, while the shiny side results from the manufacturing process. Both sides are equally safe and effective for cooking. In my kitchen, I’ve found the heavier-duty versions work best for grilling and high-heat roasting.
Historical Development of Kitchen Aluminum Foil
The journey of aluminum foil in our kitchens began in the early 1900s, though its roots trace back to 1825 when first commercial foil used tin. I recently learned that Swiss chocolate makers originally pioneered foil wrapping, using it to protect their delicate treats. By 1910, the first aluminum foil rolling plant in America started producing this kitchen marvel. What’s fascinating is how World War II actually boosted its popularity – when tin became scarce, aluminum foil stepped in as the perfect alternative.
In my grandmother’s recipe box, I found notes from 1947 about switching from wax paper to this “amazing new aluminum wrap.” Today’s foil has come a long way from those early days. The modern manufacturing process creates a product that’s 98.5% pure aluminum, making it thinner yet stronger than ever. I’ve noticed how even the bargain brands now offer quality that would’ve amazed those early users.
Environmental Impact and Recycling Benefits
Aluminum foil plays a crucial role in sustainable kitchen practices. I’ve discovered that recycling just one pound of foil saves enough energy to power a TV for three hours! While collecting foil scraps in my kitchen bin, I noticed how quickly they add up. Unlike many materials, aluminum recycles infinitely without quality loss. Last summer, our local recycling center shared that clean foil balls larger than 2 inches process best. Here’s a smart tip: I keep a small container near my sink for rinsed foil pieces.
However, remember that heavily soiled or burnt foil typically can’t be recycled. What surprised me most was learning that recycling aluminum uses 95% less energy than producing new foil. In my neighborhood, we’ve started a kitchen recycling challenge, and foil collection has become quite competitive. Just make sure to remove any food particles before tossing it in the recycling bin.
Step-by-Step Aluminum Foil Handling Techniques
Proper Sizing and Tearing Methods
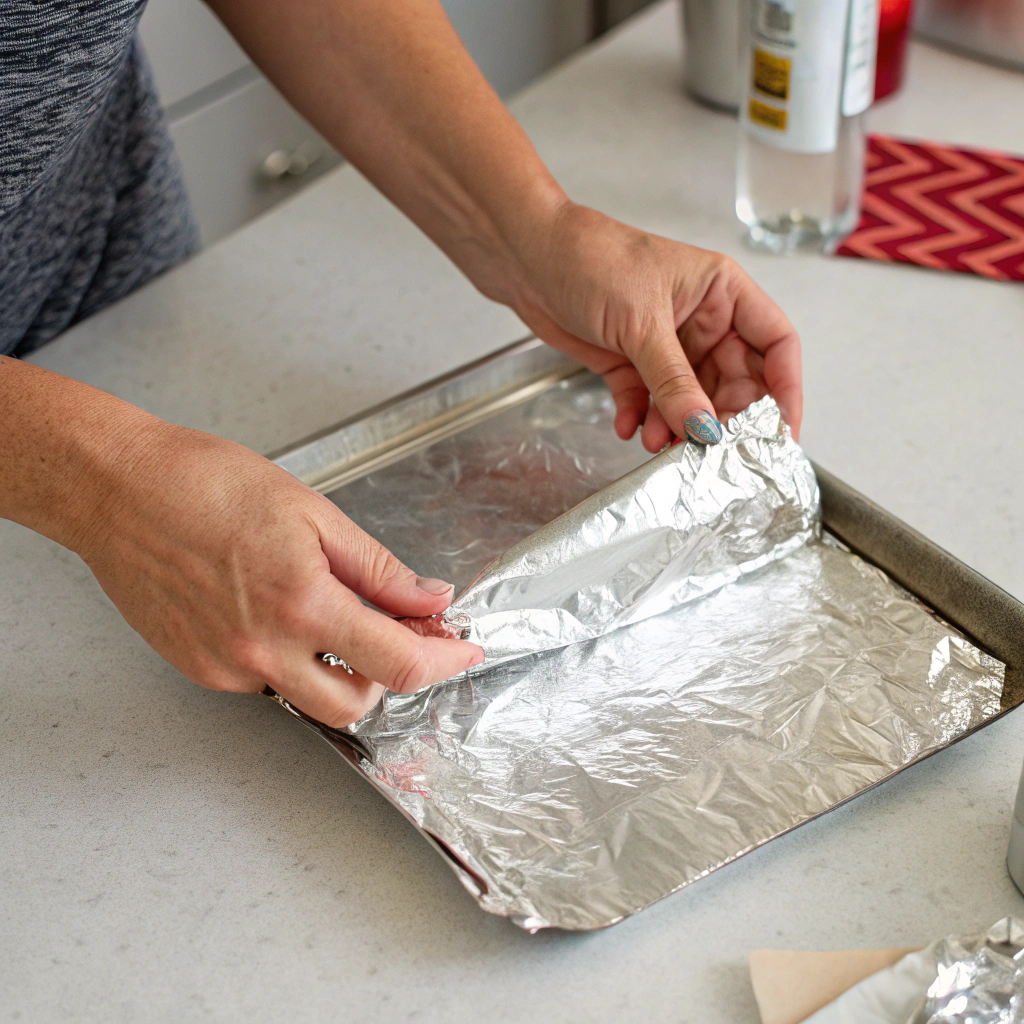
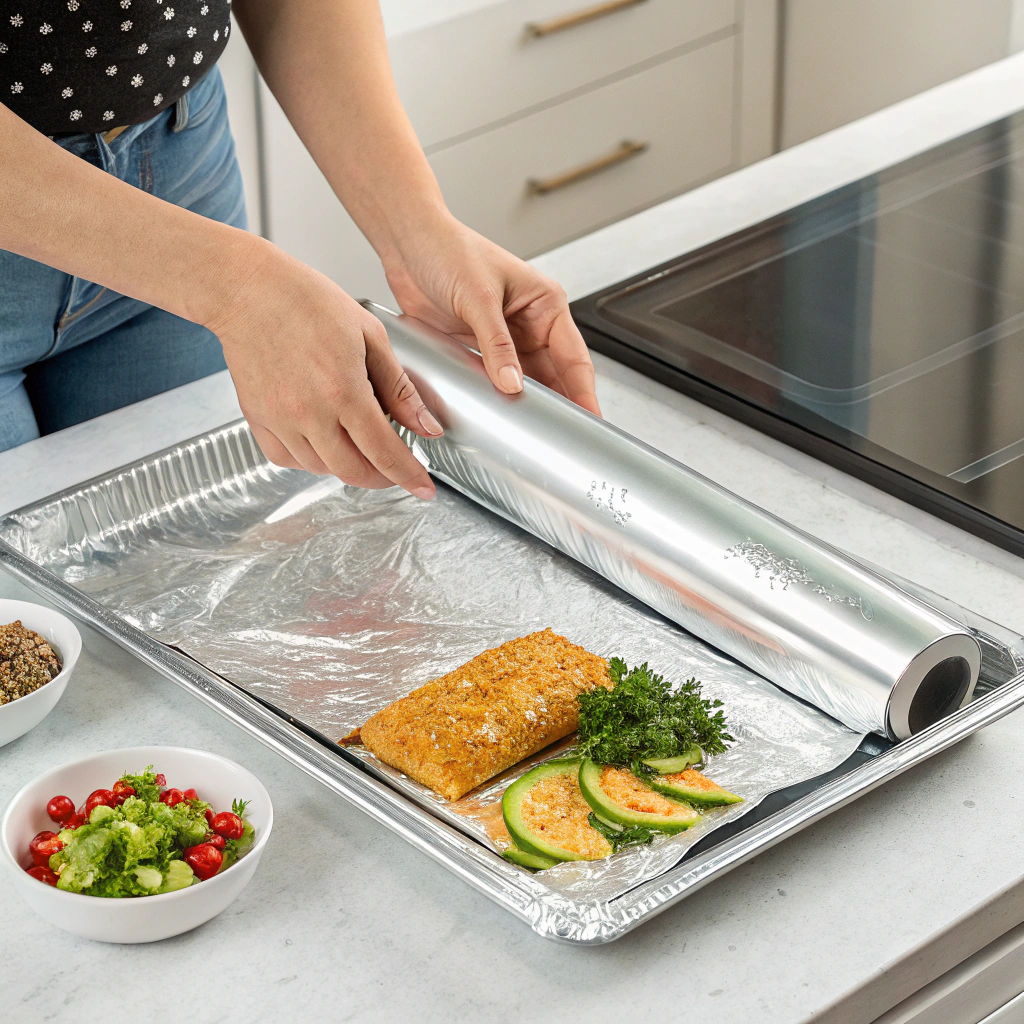
Getting the perfect piece of aluminum foil starts with mastering the basics. I’ve found that pulling the foil toward me at a 45-degree angle creates the cleanest tear. For consistent sizing, I use my baking dishes as measuring guides – no more wasteful oversized pieces! A game-changing tip I discovered: the built-in tabs on foil boxes aren’t just for show. Press them inward to lock the roll in place, preventing those frustrating moments when the whole roll jumps out.
When wrapping food, I always leave about two inches of extra foil on each side for proper sealing. Here’s a pro move: for delicate items, tear two shorter pieces instead of struggling with one long sheet. This prevents tearing and gives you more control. Remember to smooth out the foil completely before using it to ensure even coverage and prevent hot spots during cooking.
Innovative Aluminum Foil Storage Solutions
I’ve discovered some clever ways to maximize aluminum foil efficiency in the kitchen. Store your rolls vertically in a repurposed magazine holder – this saves counter space and makes grabbing sheets a breeze! Another game-changing tip: label your partial rolls with their dimensions using masking tape. This prevents waste when you need specific sizes later. I keep a designated “reuse” container for clean foil pieces that can handle another task.
For camping trips, I pre-cut and stack foil squares between paper towels, then store them in a large zip-top bag. This prevents damage and keeps them ready for quick meal prep. In humid climates, store your foil in a sealed container with a silica gel packet to prevent moisture damage. Consider keeping a second roll in your outdoor grilling station for convenient access during barbecues.
Aluminum Foil Hacks for Better Cooking Results
When using aluminum foil in cooking, positioning matters tremendously. Create a shiny side up “tent” over delicate fish to reflect heat evenly, while placing the dull side up works better for browning and crisping. I’ve found that double-layering foil prevents those frustrating tears when wrapping heavy or bone-in meats. For perfectly sealed packets, fold the edges twice and crimp firmly – you’ll hear that satisfying crinkle that means it’s airtight!
Here’s a game-changer: crumple foil into balls and place them in your slow cooker to elevate ingredients above liquid. This prevents soggy bottoms and promotes even cooking. When grilling vegetables, poke tiny holes in your foil packets to let excess steam escape while keeping moisture balanced. For sticky foods like cheese or marshmallows, a light spritz of cooking spray on the foil works wonders.
Professional Tips for Perfect Foil Usage
Heavy vs Regular Foil Selection Guide
Let’s talk aluminum foil thickness – it’s not one-size-fits-all! Heavy-duty foil (0.024mm) is your go-to for grilling, freezer storage, and high-heat cooking above 400°F. The thicker material prevents those dreaded rips when wrapping hefty roasts or handling bulky vegetables. Regular foil (0.016mm) works perfectly for lighter tasks like covering casseroles, lining baking sheets, or making simple packet meals. I always keep both types in my kitchen – heavy-duty near the grill and regular by the oven. Pro tip: If you’re only stocking one type, go with heavy-duty. While it costs a bit more, it’s more versatile and durable. Just remember to fold it double for extra protection when needed. The investment pays off in fewer tears and better heat distribution.
Clever Aluminum Foil Hacks Beyond Basic Wrapping
Did you know aluminum foil can be a kitchen superhero? Shape it into a makeshift funnel for transferring ingredients, or crumple it into a ball for scrubbing stubborn grill grates clean. One of my favorite tricks is creating a custom-sized baking pan by molding foil over the bottom of your regular pan, then carefully lifting it off. For perfectly crisp bacon, accordion-fold a foil sheet to create ridges, place it on a baking sheet, and lay the bacon strips across the peaks – the fat drips away while cooking!
You can even fashion a solar oven by covering a pizza box with foil and angling it toward the sun. When working with acidic foods like tomatoes or citrus, remember to use the dull side of the foil to prevent any metallic taste from transferring.
Essential Safety Tips for Aluminum Foil Usage
When handling aluminum foil in the kitchen, always trim sharp edges to prevent cuts. While microwaving, avoid using foil completely as it can cause dangerous sparking and damage your appliance. For food storage, never wrap still-hot foods directly in foil – let them cool first to prevent bacterial growth in warm spots. I’ve learned to be extra careful with seafood and highly spiced dishes, as they can react with the foil and develop holes.
Keep foil away from direct heat sources like stovetop burners, and never use it to line your oven’s bottom as it can reflect heat and disrupt cooking temperatures. When grilling with foil packets, create small steam vents to prevent pressure buildup. Remember to discard any torn or heavily wrinkled foil, as these weak spots could contaminate food.
Common Aluminum Foil Challenges Solved
Preventing Tears and Holes
Working with aluminum foil can be tricky, but there are smart ways to prevent frustrating tears and holes. Start by choosing heavy-duty foil for demanding tasks like grilling or roasting. When wrapping irregularly shaped items, use gentle movements and avoid pulling the foil too tightly around sharp edges or corners. I’ve found that creating a double layer around pointy bones or rough surfaces provides extra protection. For delicate foods, try placing a layer of parchment paper between the food and foil to prevent sticking and tearing.
Always smooth out wrinkles before use, as these weak spots are prone to developing holes. A helpful tip is to fold the edges twice for a stronger seal that won’t split open during cooking or storage. Remember to handle the foil with dry hands, as moisture can weaken the material.
Alternative Uses for Aluminum Foil
Beyond its traditional food wrapping role, aluminum foil has numerous clever applications in the kitchen. You can shape it into a funnel for transferring ingredients or create a makeshift baking sheet liner when you’re in a pinch. For perfectly crisp pie crusts, fashion a protective ring to prevent over-browning edges. The reflective properties make it excellent for focusing heat – create a foil tent around slow-cooking dishes to concentrate warmth where needed. I’ve found it works wonders as an impromptu pot scrubber when crumpled into a ball, especially for stubborn, baked-on residue.
You can even fashion a disposable drip pan for your grill or use it to clean your steel wool pad. My favorite trick is creating custom-sized cake pan dividers by folding strips into sturdy barriers. These versatile solutions have saved many cooking situations in my kitchen.
Smart Storage with Aluminum Foil
Proper aluminum foil storage techniques can extend its usefulness in your kitchen. Store the roll horizontally in its original box, pressing in the end tabs to create a smooth dispensing action. For bulk rolls, designate a drawer with dividers to prevent rolling. I’ve discovered that keeping a smaller roll in an empty paper towel holder provides easy access while cooking. To prevent tearing, avoid storing heavy items on top of foil boxes. When working with partial sheets, create a designated “scraps envelope” from an old cereal box – these pieces are perfect for small wrapping jobs. For maximum efficiency, keep your most-used foil width near your prep area and store specialty widths (like extra-wide rolls) in a separate cabinet space.
Creative Aluminum Foil Applications
Traditional Cooking Methods
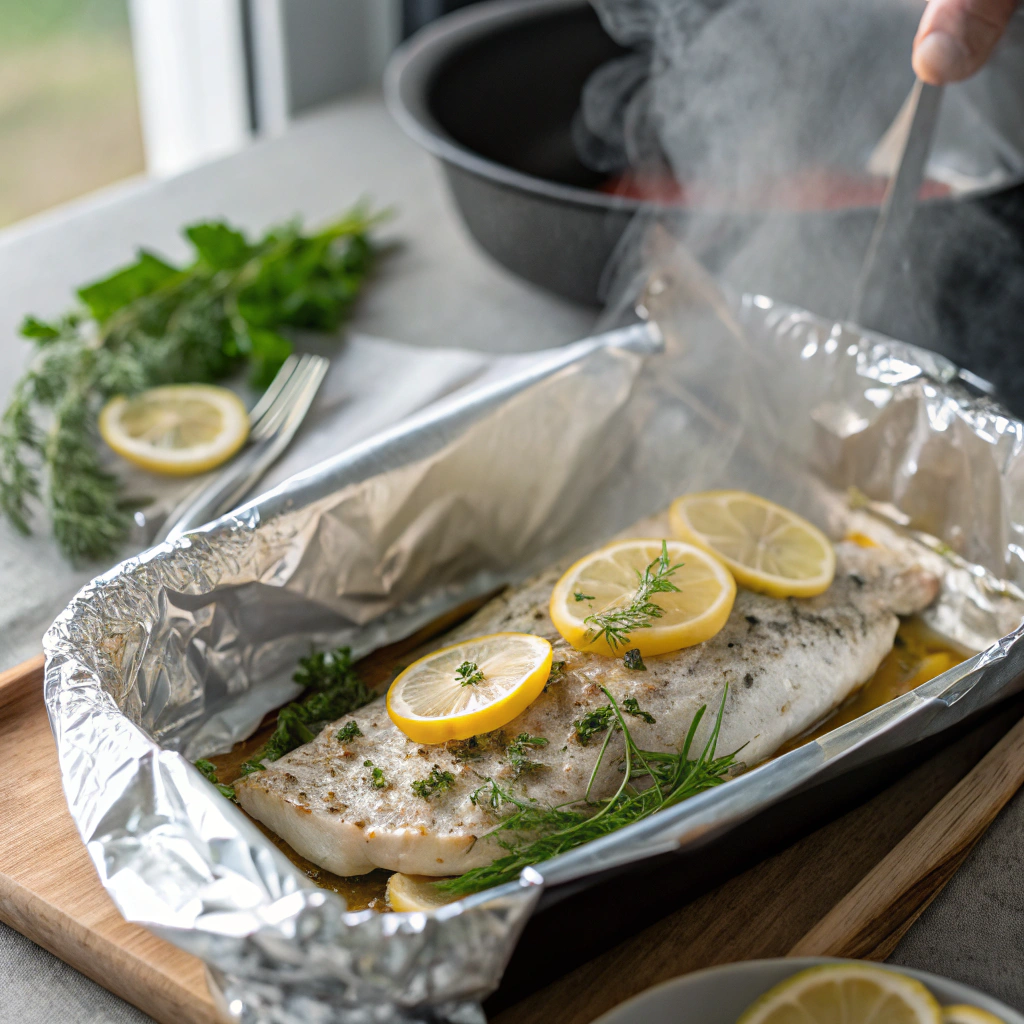
Aluminum foil shines in classic cooking techniques that have stood the test of time. When roasting a whole chicken, create a foil tent during the first 30 minutes to prevent over-browning while keeping moisture locked in. For perfectly steamed fish, fashion a foil packet with herbs and lemon slices, creating tight crimped edges that seal in flavors. I’ve found that making a double-layered foil boat for grilling delicate vegetables prevents them from falling through the grates while allowing just enough char.
To achieve evenly baked potatoes, wrap them in foil after pricking and rubbing with oil – the steam created inside develops that fluffy interior we all love. Remember to position the shiny side inward when wrapping foods, as this reflects heat back toward the ingredients.
Clever Aluminum Foil Kitchen Hacks
Aluminum foil isn’t just for cooking – it’s a versatile kitchen problem-solver. Transform it into a makeshift funnel by molding it into a cone shape for transferring ingredients without spills. When you’re low on scrubbing tools, ball up foil to create an effective pot scrubber that tackles stubborn, baked-on food. Keep your oven clean by placing a foil sheet on the bottom rack to catch drips and spills.
For perfectly shaped pie crusts, wrap the edges with strips of foil to prevent burning while the center bakes to golden perfection. I’ve discovered that sliding pieces of foil under cake pans creates instant handles for easy removal from the oven. When storing celery, wrap it in foil instead of plastic – it breathes better and stays crisp longer in the refrigerator.
Essential Aluminum Foil Safety Tips
When using aluminum foil in cooking, always place the shiny side facing inward to maximize heat reflection. For food safety, never reuse foil that’s been in contact with raw meat or fish. While microwaving, avoid using foil as it can cause sparking and damage your appliance. Instead of wrapping acidic foods like tomatoes directly in foil, use a barrier like parchment paper to prevent any metallic taste.
When grilling with foil packets, create small steam vents to prevent dangerous pressure buildup. I’ve learned to avoid using foil with citrus-based marinades since the acid can break down the material. For food storage, remember that foil doesn’t create an airtight seal, so transfer leftovers to proper containers within two hours of cooking. Double-check that foil edges are completely sealed when wrapping items to prevent freezer burn.
Start Mastering Aluminum Foil Today
Ready to transform your cooking game with these aluminum foil tricks? Start with the basics: grab both regular and heavy-duty foil for your kitchen. Practice making tight seals and proper venting techniques. Keep this guide handy for quick reference, and don’t forget to share your success stories! Join our cooking community for more tips and tricks that make every meal better. Your next culinary adventure awaits – let’s get wrapping!